In 2013 I moved back home to Australia after a failed beer project in China. Once I arrived I quickly returned to the workforce and instantly landed a brewing job and moved into a spare room above a warehouse. These two factors gave me a unique opportunity to test my skills: brewing commercially on a 5,000 liter DME brewhouse by day, and building home brewery equipment from scratch at night.
Three years later, in 2016, I was invited back to China by a new company. This meant I was obliged to pack up my brewery once again and move it to the man cave of my good friend, The Professah.
 Background
In fact it was not so straightforward. After discovering certain issues with my lodgings, I was obliged to move back with my parents, which was immediately followed by a move to a share house in Sydney’s inner west. Six months later I moved to Tokyo. Each of these moves required me to dismantle the brewery and reassemble it in a new location. Just as I settled in with a friend nicknamed Panda, I had to once again move – this time to Japan.
I spent three months in Sydney before returning to China, during which time I retrieved the brewery from Panda and transported it over to a much more loving owner, The Professah.
Original System: The Trash Mansion Brewery
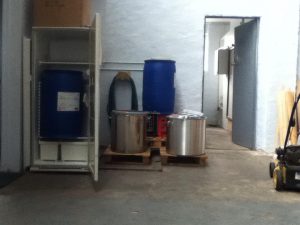 The brewery was built from scraps and samples, as well as anything I could buy as cheaply as possible. It still worked out about the same as buying a new homebrew system outright. Let’s remember: sometimes brewing is a labor of love!
If you want to save time and get everything right the first time, take a look at the equipment section of this website. If you are interested in the key components of the Trash Mansion Brewery, read on!
- 100 liter HLT made from an aluminum pot
- 100 liter kettle, stainless steel pot
- HDPE magnetic drive transfer pump (one of the small green ones you find on Amazon)
- Pump manifold made from brass fittings, valves, and a lacquered wooden board (I burned in a hop motif using a soldering iron)
- Secondary, mobile magnetic drive pump (a sample from a factory in China)
- 125 liter mash tun, made from a used HDPE canola oil drum.
- Mash tun insulated with adhesive foam strips
- False bottom rigged up from water connectors, with the inner seals removed for wort flow
- Copper HERMS coil, doubling as an immersion chiller
- Flexible and removable plumbing made from food-grade water connectors from my local hardware store
- Flexible outlet hoses made from food-grade silicon
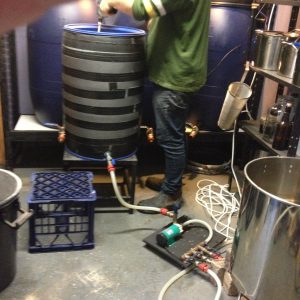
- Fermenter built from a 125 liter HDPE barrel and brass fittings
- Fermentation incubator from a converted refrigerator, with shelving and seals removed. Temperature controlled by an external thermostat
- Fittings made from brass and stainless steel
- Dual 3-ring gas burners (on loan – these had to be returned to their original owner)
The Professah
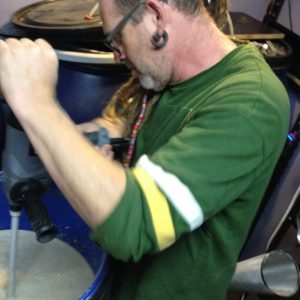 An engineer, artist, builder, shipwright, one-man workforce, and much more, all rolled into one. The Professah is one of those enviable individuals who seem to excel at everything they try. He also happens to have some excellent skills that make him a perfect brewer.
In the back of his house overlooking the East Australian coastline, The Professah has a tiny wine lab where he concocts all kinds of strong and flavorsome fruit wines. He generally produces batches of over 200 liters, so fitting a 100 liter brewery in was no easy task.
Among other skills, The Professah is also an amateur chemistry enthusiast. It goes without saying that this is a perfect skill-set for a fledgling beer brewer!
System Upgrades
Before we even started brewing, The Prof cast his eye over the system and was able to make some key changes right away. At this stage he had never brewed a beer before, so there were some issues from the start, but here are the key changes:
- Upgraded the transfer pump and manifold
- Removed the wooden board
- Added wheels to both pumps
- Replaced the false bottom with a prefabricated stainless steel model (get one at Homebrewing.org)
- Added built-in brick heat retainers around the burners
- Upgraded the immersion chiller – instead of running tap water, it now circulates cold water from a 1,000 liter drum of water; much more eco-friendly
- Added an electric stirrer to the system for better mash
Issues and Workaround
After so many moves, it was actually a real pain to set 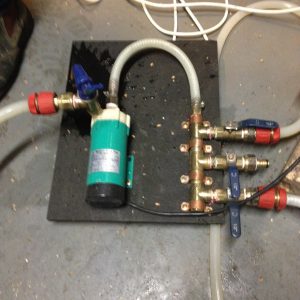 everything up and get it working right. That first brew day with The Professah ended up taking around 12 hours as we messed around with broken parts and hasty upgrades.
Lack of Space
The first obvious issue was the size of the man cave we had available to us – it was already a fully functional home wine lab. There was about four square meters of space, and the brewery took up three. There was no workaround to this issue, so we just had to shuffle everything.
Broken Grain Cracker
This had been given to me four years previously in a home brew shop I worked at. It was replaced because it had issues. Finally, once transported halfway across the state at least three times, it stopped working entirely. Being out near the beach and with no access to a replacement, we were in a tight spot.
In the end, we had no choice but to try using a blender. I do not recommend trying this – our crush was hideous and led to a very low extract efficiency. Oh, and a stuck sparge. Go get a grain cracker from the supplier directory.
Only one burner
As I mentioned earlier, I had returned my twin 3-ring burners to their original owner and The Professah only had one. We had to heat our strike water, then heat the sparge water during the mash, and then finally deal with whatever temperatures we could manage once the brew was on boil. The two brick ovens we built for heat resistance helped a lot, but still added an hour to the brewing process.
 New false bottom did not seal
Inside the HDPE drum we used as a mash tun, the base had a long and thick mold line where the two halves were melded together. This led to the false bottom never quite sealing to the base of the tun, so we had an extra-long recirculation to clarify the wort.
This also led to the opposite problem once we hit the sparge – we had grain build-up in the plumbing under the false bottom, which led to the dreaded stuck sparge. These issues contributed massively to our long brew day.
Fixed pump manifold not priming
Due to an extended period of inactivity, our little green pump kept failing to prime. We did manage to bleed the line a few times, but eventually we had to give up and use the backup mobile pump for the entire brew day.
No fermenter
One tragic loss during the move was the original fermenter. It was acquired in a friendly but aggressive highway robbery by Panda. Fortunately, we were able to use The Professah’s original 240 liter wine fermenter. Even though we cleaned and sanitized it thoroughly, I was nervous about cross contamination – but ultimately didn’t need to be, as the beer came out just fine.
Recent Upgrades
That first brew day at the upgraded Trash Mansion Brewery taught us a few very valuable lessons. The Professah has kept me up to date with developments since my departure:
- For now, we only buy pre-cracked grain
- We now have double burners, still ensconced in their brick ovens for heat efficiency
- The fixed false bottom is in place with some nifty plastic and metalwork
- There has been a complete overhaul of the pump manifold
- There’s a new fermenter, using the same design as the original
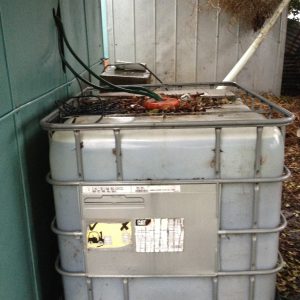
A 1,000 liter cold water tank for circulating through the immersion chiller
CHECK OUT: This Beer Brewing Calculator, a handy tool for any budding brewer.
CHEERS!
Thank you for reading. If you want to design your own brew house, I strongly recommend reading both ‘How To Brew’ by John Palmer as well as ‘Radical Brewing’ by Randy Mosher. Both are available on Amazon at a low cost. Parts are generally available on eBay, Amazon, and Adventures in Homebrewing (with international shipping). You can find fittings and connectors at your local hardware store or scrap metal merchant.
If you are looking for a cheap or easy way to start brewing, I highly recommend buying a pre-made system. It may seem more expensive at first, but will be cheaper and easier in the long run. Trust me on this – I’ve spent thousands of dollars on my own systems, all for the love of my hobby! One of the best systems for starting out is the Igloo Cooler Mash tun – it provides the basics of a compact, efficient, and mobile brew house.
 There are also some great automatic systems available. My favorites are always the Grainfather, the Braumeister, and the PicoBrew Zymatic. These are expensive but awesome for a variety of reasons – check them out here: All In One Brewing Systems
As always, please ask anything and I’ll be happy to reply! Happy brewing!
Read next: Home Made Vs. All-In-One Brewing Systems, The Science Behind Beer Koozies: How They Keep Your Beverage Cold!, 7 Easy Ways To Add Personalization To Your Beer Koozies and How To Find The Best Materials For Beer Koozies


Wow, this is all very informative. I have often thought it would be a lot of fun to do home brew as I used to live in Alaska, where everyone home brews. Yours looks a lot more complicated and upscale than what I saw back in Alaska though. Can I read through your site and send you some questions?
Yes, of course!
This setup was not a beginner’s home brew system. For something a little simpler, you might find this useful: How To Make Your Own Beer Kit
Extremely informative and interesting to read! My wife and I are turning our tool shed into a personal brewery. Do you think that with the tools and equipment you used here create better brews? Or can you just get away with using the simple brew kits and still have a great tasting brew?
Great question Justin!
There is no single correct answer, but generally speaking, you can make great beers with minimal equipment. The reasons for all my gear and upgrades are more advanced, and basically they are there to increase my control over the process and final product. Some of the tools are also there for better automation of processes, or to reduce time spent brewing a single batch.
If you are just starting out, here are a few articles that will help you:
The Simplest All Grain Brew System
All Grain Brewing Instructions: How to Mash Beer
How to Ferment Beer
Cheers, and happy brewing!