Recently, a friend came to watch me brew in Japan on my tiny minimalist BIAB (Brew in a Bag) system. She was instantly hooked and has since been asking me for more information on the brewing basics. In this article I will cover the process that every brewer learns first and yet remains one of the biggest mysteries to home brewers: how to ferment beer.
Honoka-san, this one is for you!
How Fermentation Works
In its simplest terms, fermentation is the process of yeast eating sugar and turning it into alcohol. If you are an experienced brewer you already know this, but that is not true for everyone. I was on my 4th or 5th batch before I learned that vital piece of information!
During the brewing process, either you or your malt extract manufacturer have taken all the available starches in malt and converted them into simpler carbohydrates that yeast can eat. To make this easier to understand, think of yeast as Pac-Man. Pac-Man can only eat things that are smaller than his own head, so the brewer has had to make the complex carbohydrates smaller, into simple carbohydrates, so that your Pac-Man yeast can swallow it!
Fermentable sugars in beer typically include:
- Maltose
- Dextrose (aka glucose/corn sugar/invert sugar)
- Fructose
- Sucrose (table sugar)
Lag Phase (getting settled in)
Once the yeast has been pitched’, meaning ‘added to the wort’, your yeast will remain relatively inactive for anywhere between 30 minutes to two days. This is called the ‘lag phase’.
Aerobic Fermentation (the alcohol fermentation process)
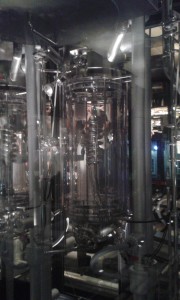
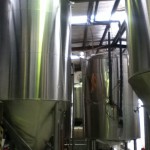
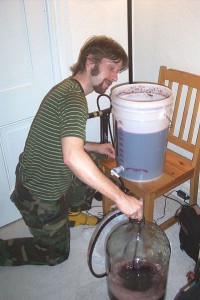
Transparent fermenter at Spring Valley Brewery
Following the lag phase, having settled into its new home, the yeast gets hungry and starts to eat sugars. This part of the fermentation is called the Aerobic phase, as the yeast also uses up as much of the available oxygen in the wort as possible. The Aerobic phase is very vigorous and is also the phase where most of the yeast reproduction occurs, resulting in a layer of yeast at the bottom of the fermenter.
The Aerobic phase of fermentation produces most of the alcohol in your beer, converting most of the sugars and also thinning out the liquid (this is why the gravity of the beer is often used to determine alcohol content.) During this phase there are also a lot of off flavors produced, which are then dissipated in the next phase.
Anaerobic Fermentation (cleaning up)
By now, your gravity has dropped quite rapidly, but has now has started to slow down the rate of attenuation (the thinning out of the liquid as sugars are converted to alcohol). During this phase there is almost no oxygen left in the liquid. The yeast slows down on reproduction, and now that there is less sugar to eat, it starts eating all the bad smelling chemicals that were produced during Aerobic fermentation.
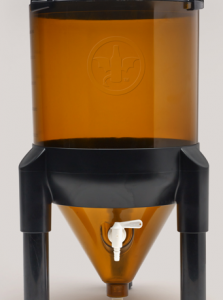
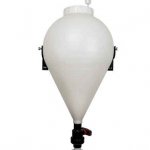
Plastic Conical Fermenter
At this time, you will have a lot of yeast at the bottom of your fermenter. In warm temperatures or under pressure (due to a large volume of beer sitting on top of it), the yeast near the bottom may start cannibalizing the other yeast cells around itself, in a process called ‘autolysis’. This is a bad thing, as autolysis produces awful solvent/burnt plastic aromas. This is the reason why many brewers use a secondary fermenter. An even easier approach is to simply use a conical fermenter and drain the yeast out from the bottom – check out more on conical fermenters here.
Priming (making bubbles)
Many home brewers and even some commercial breweries choose to enter a final phase of fermentation directly after Anaerobic fermentation, which produces carbonation inside a bottle or keg, or even a pressure-regulated fermenter. Once final gravity is reached, the settled yeast is removed and more sugar is then added to the beer.
In a pressure-sealed environment, the yeast then starts another anaerobic fermentation, but the C02 is trapped in the beer. This phase takes much longer, due to both a lack of oxygen and a pressurized environment. This means that the off-flavors take much longer to dissipate – generally 5-8 weeks, depending on the yeast type and alcohol strength of the beer. More on priming here.
Principles of Fermentation
Although fermentation is the one factor every brewer and home brewer will seek to control, few brewers are aware of the many minuscule variables that can have a huge impact on outcomes. Below are some basic principles of how to ferment beer and keep it healthy.
Pitching Rates
It is extremely important to pitch your yeast correctly for the sake of the beer flavor. Under-pitching and over-pitching (too little or too much yeast) both impact on flavor and also fermentation health differently, yielding results that can be undesirable for your beer. It’s also important to make sure your yeast is properly hydrated to minimize the lag phase time.
The pitching rate varies with the strain of yeast used, the batch size, and the original gravity of the wort, but generally the rate is between 5 million and 20 million cells per mL of wort. You can use a yeast starter calculator to work out how much yeast you need for your brew: click here for more details. Alternatively, you can use a Wyeast or Whitelabs yeast for the ideal quantity for your style – available from Adventures in Homebrewing.
Click here for a guide on how to make a yeast starter.
Yeast Nutrition
Yeast nutrients usually contain minerals such as zinc, nitrates, vitamins, and amino acids that keep yeast healthy, just like humans. Yeast nutrients are added to ensure the healthy growth of yeast during the Aerobic phase.
Generally, home brewers don’t need to worry too much about this step as the wort is nutritious enough for a small batch, whereas it becomes extremely important for certain strains of yeast, and in commercial breweries an added yeast nutrient is almost always used. Even under German Purity Laws, certain yeast nutrients are permitted, such as those made from dead, boiled yeast cells.
If you are doing a standard 20 liter (5 gallon) batch, usually you won’t need to worry. However, if your recipe calls for a certain yeast nutrient or you have a larger batch, check out Adventures in Homebrewing or Amazon.
Temperature Control
This is one of the most important aspects of fermentation. Every strain of yeast has an ideal temperature range. Go too far below this and you will get a slow fermentation and off flavors; too high and you will get a stinky brew with off flavors. To get around this, some brewers will select their recipes based on the season. For example, they may brew ales only in summer and switch to lagers in mid-winter. In fact, this phenomenon is what led to many great beer styles and festivals still enjoyed today.
A fairly basic method of achieving a clean fermentation in the minimum amount of time is to stick to the minimum recommended temperature for your chosen yeast strain during the aerobic phase, then raise the temperature to the maximum recommended temperature during the last few days of the anaerobic stage.
Commercial breweries and the more intrepid home brewers will use temperature controls for precise, even fermentations, and it is like a quantum leap in the quality of your beer. You can look into some cool glycol chillers and jacketed fermenters, or you can get yourself a cheap thermostatic controller from Amazon and turn your beer fridge or kegerator into your very own temperature-controlled incubator!
Yeasting Off
If you have ever wondered why people talk about racking to secondary fermenters, it’s in order to separate the settled yeast (lees) from the beer during the Anaerobic phase. This decreases the chances of issues like autolysis and also helps clear the beer faster for priming (or kegging). In commercial breweries this is not necessary; the same effect can be achieved by simply releasing the lees through the bottom of a conical fermenter – a much easier and safer process for the yeast.
For brewing at home, there are several suppliers of conical fermenters which will allow you to use the same technique, from glorious jacketed stainless steel fermenters which need a glycol chiller, all the way down to a cheap and cheerful conical fermenters that fit in your beer fridge/incubator – check out the supplier directory for options.
Priming and Conditioning
If you haven’t already, please check the how-to-guide on bottling beer.
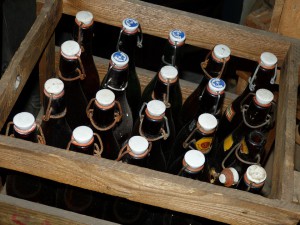
Primed beer bottles
When priming bottles or kegs, you will want to follow the same principles of fermentation as you did during the primary phases. For the first three weeks after bottling, keep the bottles within temperature range. After three weeks, you may like to cellar the beer or just keep it at temperature. Each beer type will peak at a different length of time, but eight weeks is a good all-round estimate.
If you are conditioning your beer for kegging, you will want to remove all of the yeast, or at least as much as possible, and then drop the temperature to cellaring temperature – around 2ºC (that’s 35.6ºF) – until the beer is at an optimal flavor profile. You can do this in kegs with CO2 to make things easier, and just leave your conditioning beer at cellaring temperature until it is ready. For best results, condition the beer for the same length of time as you would have primed it.
Recommendations
First, get yourself a good pitch rate calculator. Try out BeerSmith or Brewer’s Friend for free (here.)
Next, make life easy for yourself and try out a conical fermenter. You can start off with low-cost plastic conical fermenters – check out my review of the BrewDemon fermenters.
Temperature control is one of the most important things to be mindful of, and just leaving your fermenter in a cool part of the house will never be as good as an incubator. Get an old fridge or use your kegerator – all it takes is a cheap thermostat and you have an instant quantum leap in beer quality.
While we’re at it, check out kegs and kegerators for fermenting, cellaring, and packaging with minimum space requirements in the supplier directory.
If you are planning to keg your beer, you can greatly reduce the amount of time you will need to wait before kegging by using a filter. Read this how-to Guide for details.
CHEERS
Thanks so much for reading, I really hope this guide on how to ferment beer will help you reach a new level of brewing or at least supplement your existing knowledge.
If you have anything to add, any questions or any comments, please let me know in the comments section below!
Read Next: Common Mistakes When Keeping Beer Cold and 7 Ways To Cool Beer Without A Fridge




Hello Jesse,
Very interesting article to read, what all is necessary to bring me that pint on the table.
The other day, I read in the newspaper there is a shortage of production of hop. Have you problems with that too?
I do think that brewing beer is still a man’s thing to do. I am more the person to serve and drink the beer.
So I love to drink a beer with you one day, cheers!
Loes
Hi Loes, I am afraid I must disagree with you regarding brewing being a man’s thing – I have huge respect for the Pink Gumboots society as well as female brewers all over the world!
With regards to hops, it usually depends on what you need. European crops of Saaz and American Amarillo seem to be short every year, and sometimes my favourite NZ hops are extremely hard to find. Fortunately the principles of fermentation are more controllable.
But, I’m never one to turn down a pint, so cheers!
Thank you for your comprehensive answer, I had no idea there was a Pink Gumboots society:) Anyway, I hope your can always trace down your favourite NZ hops.
I drink on on you, Loes
Thank you Loes! Cheers
Thank you Jesse!
I’m getting more interested in brewing beer! I like ”Pac-Man” yeast. It’s easy to understand about the structure of yeast.
I’m very happy, I can always start brewing with this! Thank you very much : )
You are very welcome Honoka!
My next article will be about the mash chemistry – remember the part where we mixed everything together?
Sure, I remember it. It was a very fun time! We mixed everything in a big cylindrical pot. I love that aroma!
Well the next one is all about that process!
How to mash beer
Have fun!
What a great article! I want to get into brewing my own beer, but just don’t know where to start. I will probably start off with one of those home brewing kits. I didn’t know you could brew beer in a bag, that is new to me. Well the whole world of home brewing is new to me. I just think the process is so cool and to be able to say that you made that.
Albert, I totally understand where you are coming from! It can be intimidating, especially when the internat has so much information on the topic – it’s very overwhelming.
I do highly recommend just getting the hang of fermentation first, using a homebrew kit (Click here!)
Once you are more cnfident with the fermentation side of things, move on to partial mashing or all grain bres (Click here!)
Just dive in – you’ll learn more by doing than by reading, and you’ll be enjoying your own delicious beers before you know it.
Cheers!