


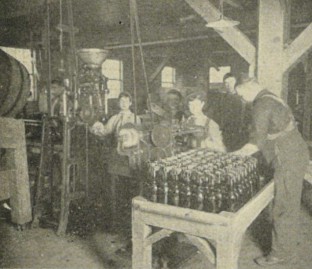
Bottling beer is one of the most tedious and labor-intensive aspects of brewing, both for home brewers and professional bottling lines. In the case of home brew, bottle conditioning is the most common method of carbonating beer.
For those who may not know, bottle conditioning homebrew is the process of adding sugar to a bottle of fermented beer and capping it, in order to produce CO2 which is trapped in the bottle. It also produces a small increase in the alcohol content.
What You Will Need
A suitable capper: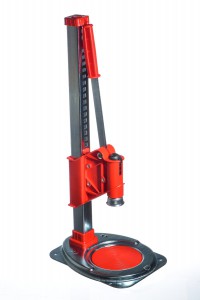
Only required if you are using glass bottles with crown seals. Check my post on beer bottle cappers to help choose one.
Bottles and caps:
Bottles will need to withstand the pressure caused by a build-up of CO2 and the caps will need to keep an airtight seal to the bottle. There is still a wide range of choice PET bottles are available brand new, some wine bottles have adequate screw caps, swing-top bottles (like the ones used by Grolsch) are stylish and easy to use. You can even keep your old beer bottles and reuse them.
Some points to be mindful of when you choose a bottle:
- Can it withstand pressure? Plastic water bottles probably won’t.
- Can you cap it safely? Reconsider using glass screw-cap bottles.
- Can light get in and damage your beer? Dark bottles are the safest.
 Bottling wand:
These are also called ‘bottling tubes’ or simply ‘bottlers’. They attach to your fermenter and you insert them inside your bottle, filling from the bottom so you don’t get a lot of foam and oxygenate your beer, which would cause it to go stale much faster.
For a couple of bucks you can get one that has a pressure release which won’t release your beer until you press the base of your bottle against the wand.
Cleaning / Sanitizing gear
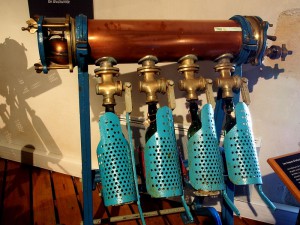
bottle washing machine
There are plenty of sanitizers out there and a wide variety of cleaning gear. For most types of sanitizer I am a huge fan of the bottling tree with sanitizer pump – it’s a neat set of devices that coat the inside of your bottle with sanitizing fluid and give you an efficient drying rack. If you want one, try homebrewing.org or Amazon.
Most sanitizers require you to leave your bottles for 20 minutes or so after sanitizing. However, if you are in a country where you can get any hydrous ethanol, use it in a spray pack – it only takes 20 seconds of contact time. But be careful, its vapors are both highly flammable and dangerous to inhale.
Safety gear
Don’t laugh – I still have a scar on my right temple from a flying glass shard several years ago. It just barely missed my eye. You’ll need safety glasses and, if using a hand-capper, a single safety glove.
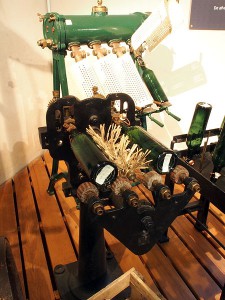
Bottle filling machine
Bottling Methods
Before you start filling your bottles, you will want to make sure they are clean and sterile. If you don’t have a bottling tree, try using a funnel. Just fill up a bottle with your sanitizer, then put the funnel in the next bottle and fill it using the sanitizer from the first bottle. It’s a great way to minimize the amount you need per batch!
Add Sugar:
Sugar can be brewer’s sugar (dextrose,) honey or malt, depending on your preference. The average sugar to beer ratio or 7g per liter – with a maximum of 8g per liter. If you go above 8g per liter, you will have little bombs that explode at random instead of delicious winning beers.
7g = a quarter ounce, 1 liter = about a quart. So for readers in the US, you want about an ounce of sugar per gallon of beer.
Single Bottle Priming
This is easy enough but quite slow. You add your sugar to each bottle and cap it, then invert the bottle a couple of times to mix the sugar in.

Usually you will want to use a standard 375ml or a 750ml bottle because most measuring devices and pre-packaged brewing sugar portions are based on this size.
This is due to the Australian brewery Coopers taking over the global home brew market in the late 20th century. Coopers bottles make an excellent home brew bottle, by the way.
For a neat trick when using non-standard bottles, use those little stick-shaped packets of sugar you get in cafes. If you can get them, use both 2g and 3g packets – with combinations of these you can reach any weight of sugar you need (for example, 2x 2g and 1x 3g packet = 7g).
Bulk Priming
This is a really easy and much more efficient way to bottle your beer. In addition to the equipment above, you will need:
- Kitchen scales
- A second (sterilized) fermenter
- A racking tube
- A long (also sterilized) plastic spoon
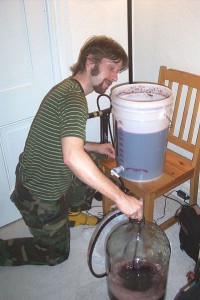
Photo by Egan Snow
First, measure out the total amount of sugar you will need for your whole batch – if using a 20L (five gallon) batch, you will need 140g (five ounces) of sugar, give or take 20g.
Dissolve the sugar in the minimum necessary amount of boiled water. This is usually about a cup for me. You can do this in the empty fermenter, but I prefer to do it in a small pot and add it to the fermenter.
Next, rack your beer (transfer it using your racking tube) into the fermenter containing sugar water. Gently stir with your sterilized spoon so as to mix the dissolved sugar into your beer.
You have left behind the excess yeast, and now you have the sugar already added to your beer – you just need to fill and cap your bottles!
Cheers!
If you need to get your hands on any of the equipment listed here, please check out homebrewing.org or Amazon. Most of this stuff is very easy to find.
As always, use safe practices and wear safety equipment. I’m not joking about my exploding-bottle scar.
If you found this How-To guide useful, please share on social media and leave any comments or questions below.
Read Next: How To Carbonate In Mini Kegs
This is great! I have always wanted to know how to craft and bottle my own beer. Years ago, I worked with someone who made their own beer. Once a month he would bring some in, and it was without a doubt the best beer I have ever had. I have thought many times about getting in to that over the years, but have been quite intimidated. This answers so many questions I had. Thank you so much!
Thanks for your comment Brandy!
Don’t be intimidated, just give it a go. And if your first batch is no good, you’ll be like most other brewers out there. Just dive right in and feel free to ask if you have any questions!
Ask a Brewer
I’ve become more interested in beer recently because of the craft beer. I’ve been wondering how to make beer, so this post is just what I needed.
On average, how much are startup costs (equipment etc.) for a newbie?
Is there a way to make beer at home, say 1 pint, easily without the equipment?
A spend of $50 – $100 should get you started – check out this page for some more details on startups.
Technically you could make a single pint at home, but the time, effort and equipment will be about the same as making a much larger batch!