


I quite often find myself away from home for extended periods of time, and without access to my kitchen and brewing equipment. However, that doesn’t stop the itch to get brewing! At times like these, I find myself dreaming up recipes and projects. For example, making ginger beer but without buying any new brewing gear. If you have seen a post from several years ago, you can see the minimal-tech brews I made in Japan. Well, today we are going even more minimalist!
I’m currently in the Philippines, but only for a 3-month stretch while I study aviation. When the Ground Crew found out I’m a brewer, naturally they’ve asked me to make them something tasty to drink. How can I refuse? The only problem is, I don’t want to buy ANYTHING that I’ll have to leave behind after earning my wings.
Perhaps you’re like me, and considering ways to brew, while away from home. Maybe you just want to try and make your own ginger beer but without the initial equipment investment. Either way, read on, and I’ll take you through step-by-step: My Zero-Tech DIY Hard Ginger Beer Recipe!
Making Homebrew Ginger Beer Alcoholic with Household Utensils:
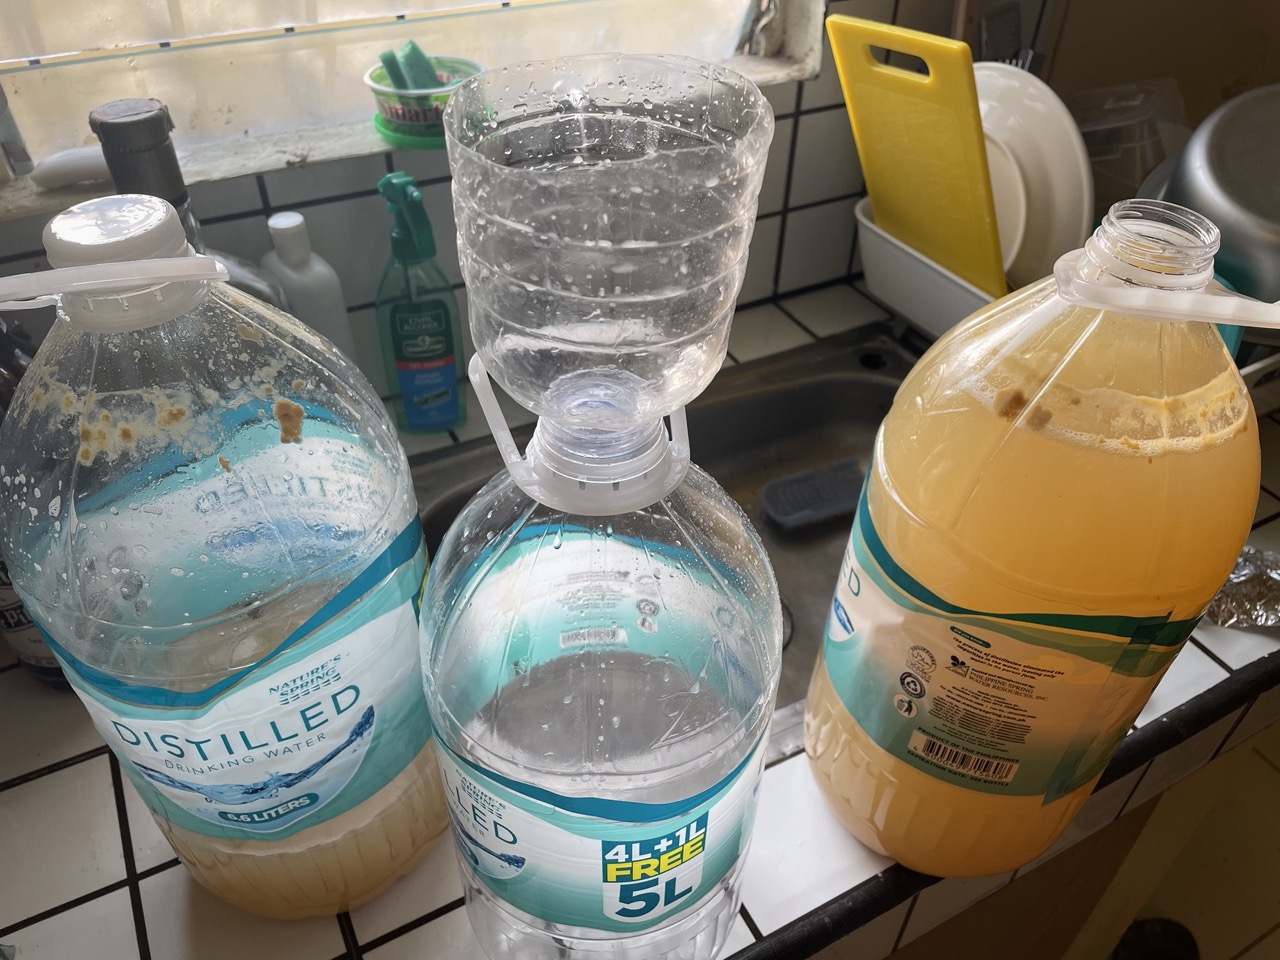
OK, so even though the aim was to purchase zero equipment, I still had to buy two things: A colander and a grater. Everything else was already in my temporary kitchen. I could definitely have used a larger pot, but as you’ll see, I was able to make do.
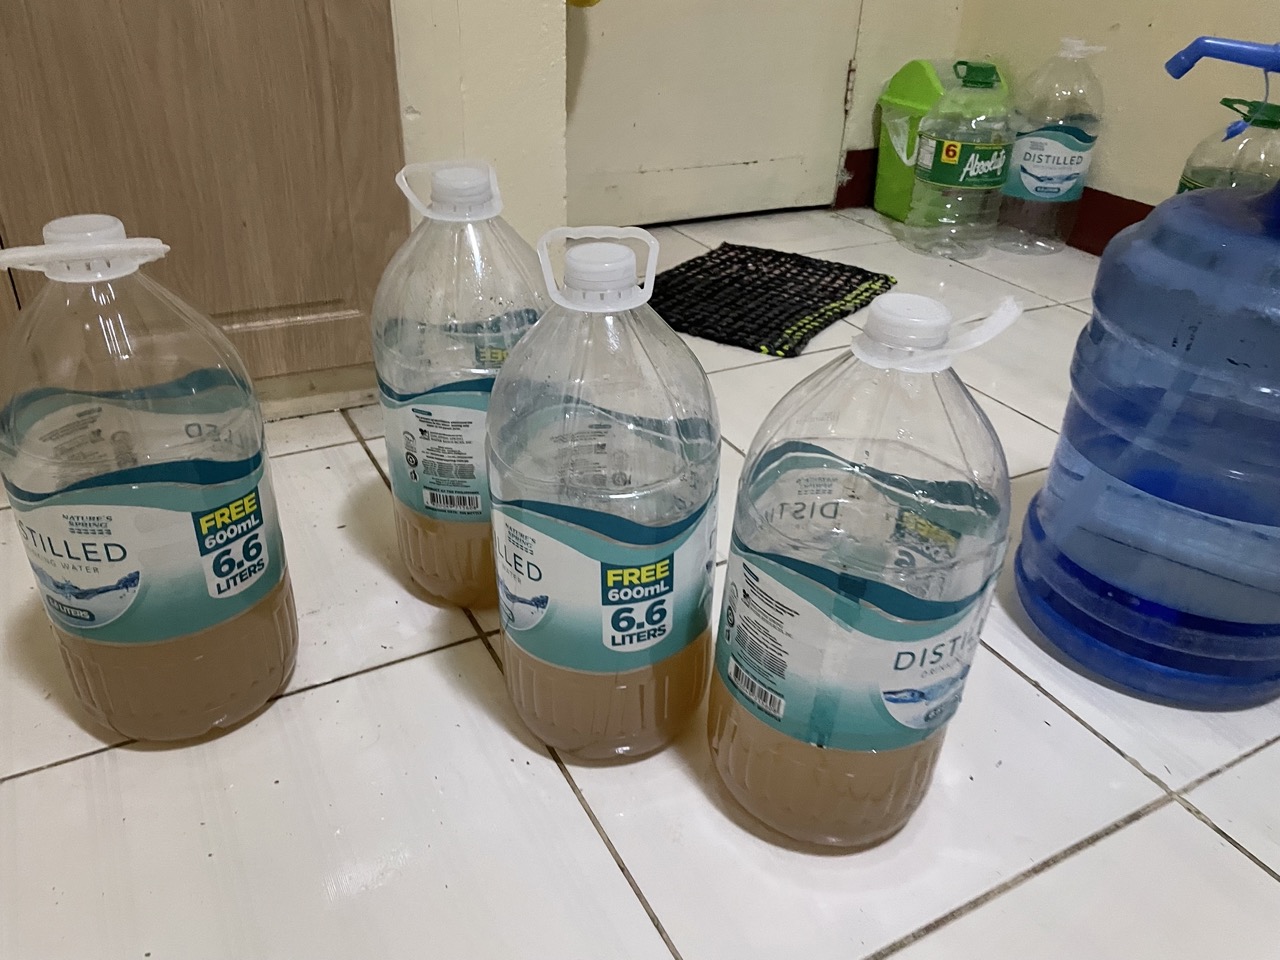
This ginger beer recipe created a batch that came to about 20 litres (roughly 5 gallons) of finished product, using the following equipment:
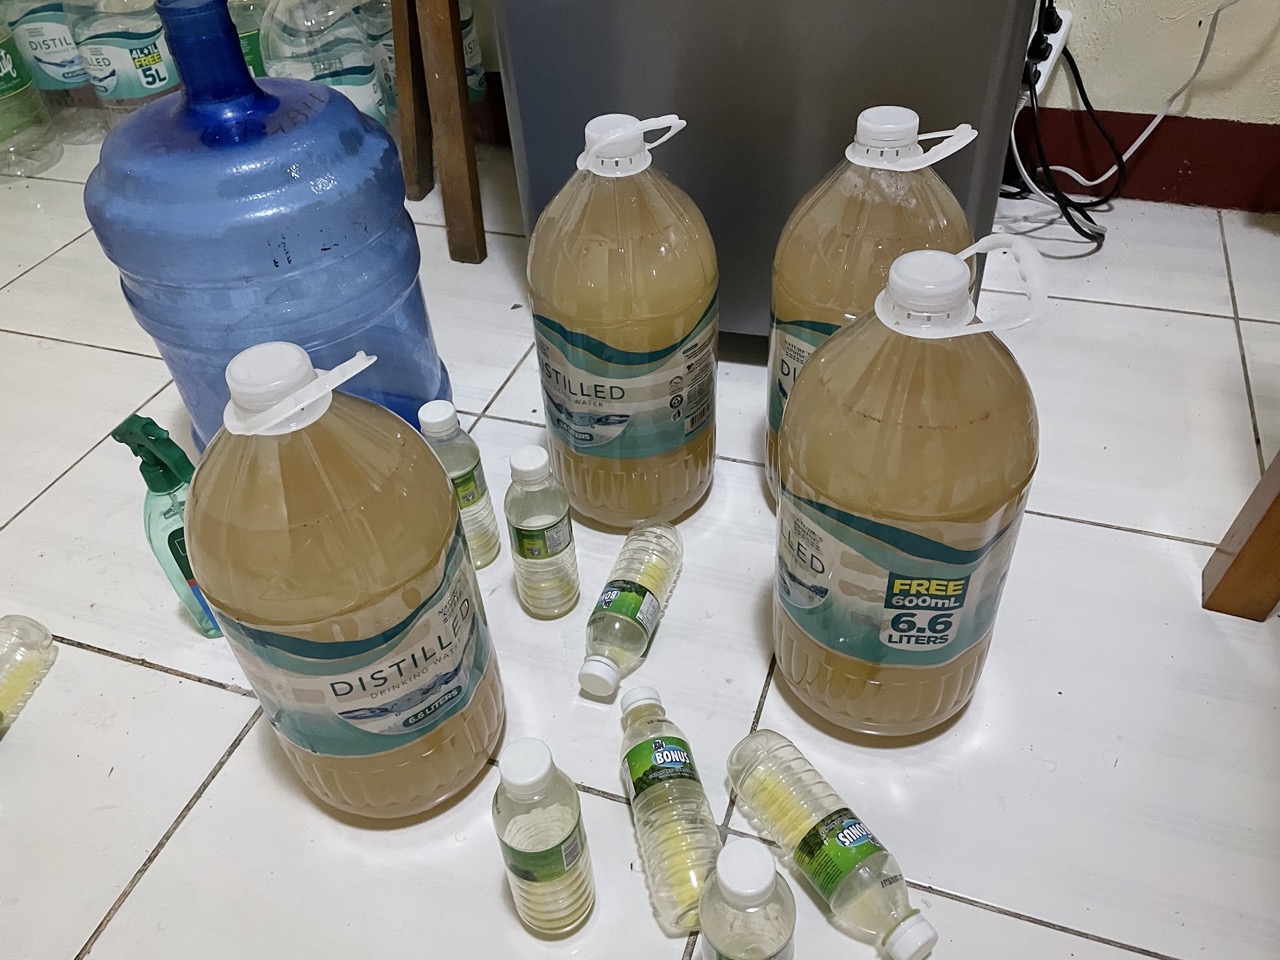
- 4 x 6.6 litre PET bottles for fermenting
- 4 x 5 litre PET bottles for conditioning
- Grater
- Pot
- Colander (optional but useful)
- Funnel (I made one out of a small PET bottle)
- Sanitizer (I used ethanol in a spray-bottle)
- Aluminium foil
That’s all!
Alcoholic Ginger Beer Ingredients:
This recipe relies heavily on the locally-sold calamansi juice concentrate. If you’ve never met a calamansi, its a small Filipino citrus, something like the child of a kumquat and a yuzu. The concentrate is a sugary, sweet-sour syrup, which is diluted with water to make a calamansi “juice,” or mixed into iced tea.
If you don’t have calamansi concentrate, you can create your own alcoholic ginger beer recipe using lime cordial, or even some lime juice or lemon juice and (often) brown sugar.
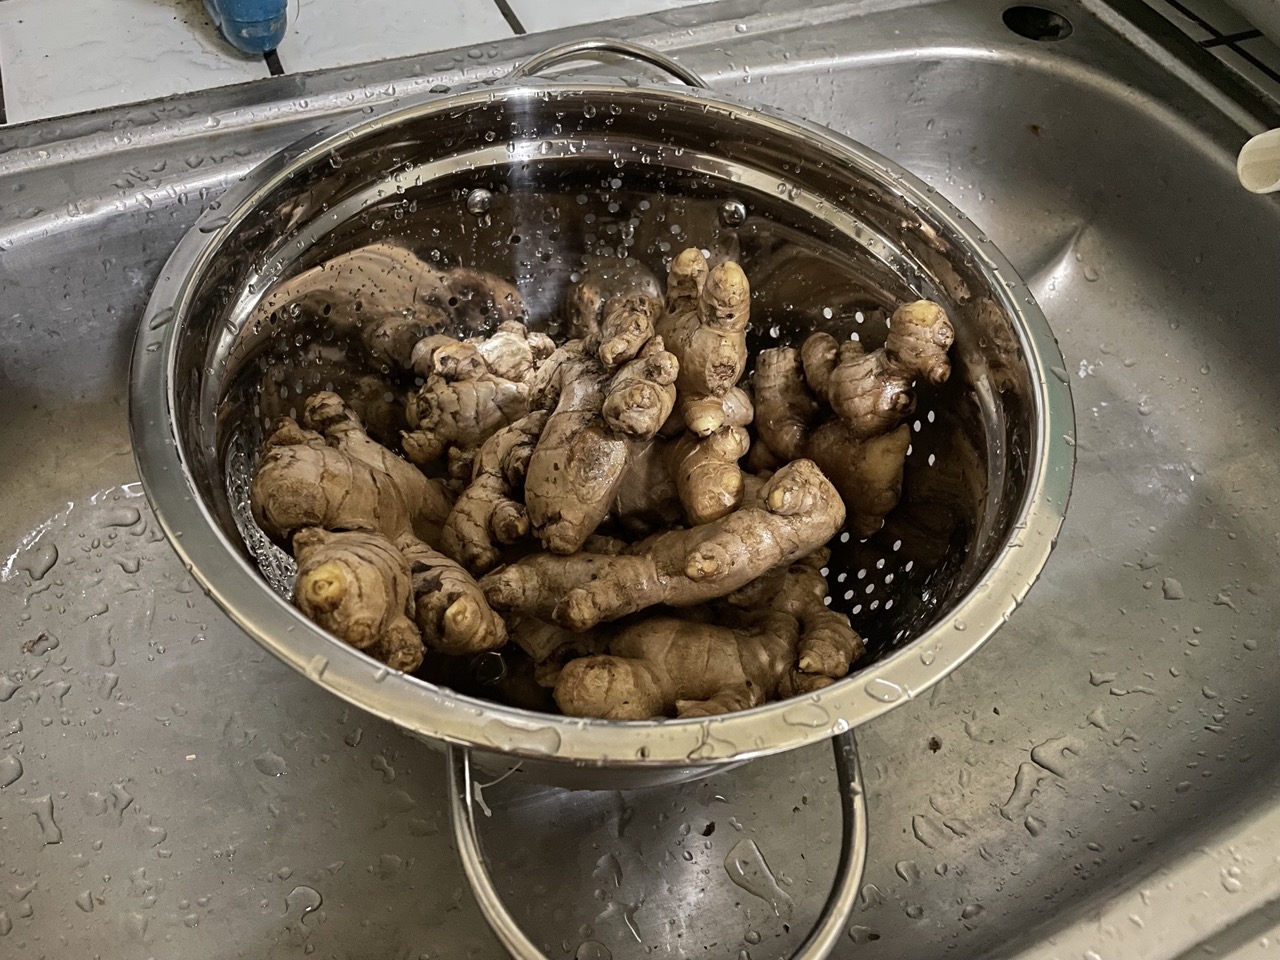
- 1kg fresh ginger root
- Enough calamansi concentrate to dilute to 24 litres
- Bread yeast
- Filtered water
- Sugar, (any sugar is fine, white, brown or even corn sugar) to bring alcohol content to desired percentage
As you can see, there is a little math to be done, when calculating volumes of sugar and concentrate. It’s impossible to get the true alcohol content accurately, without a hydrometer, but you can make a reasonable “ballpark” prediction. Here is a quick guide on doing your calculations:
- Work out the volume of concentrate using the instructions on the label. The brand I used, SM Bonus, calls for a dilution of 1 part concentrate to 6 parts water.
- Using the nutritional information on the label, calculate the sugar content of the total concentrate to be used.
- Google the average sugar content of 1kg of ginger (there are some wildly different answers, so I just picked the one that “felt” right. Not very accurate).
- Now that you have the total sugar worked out, use brewing software to calculate the predicted alcohol content.
- Add sugar to hit your desired alcohol content (also calculate this using your brewing software).
Actually Making the Ginger Beer
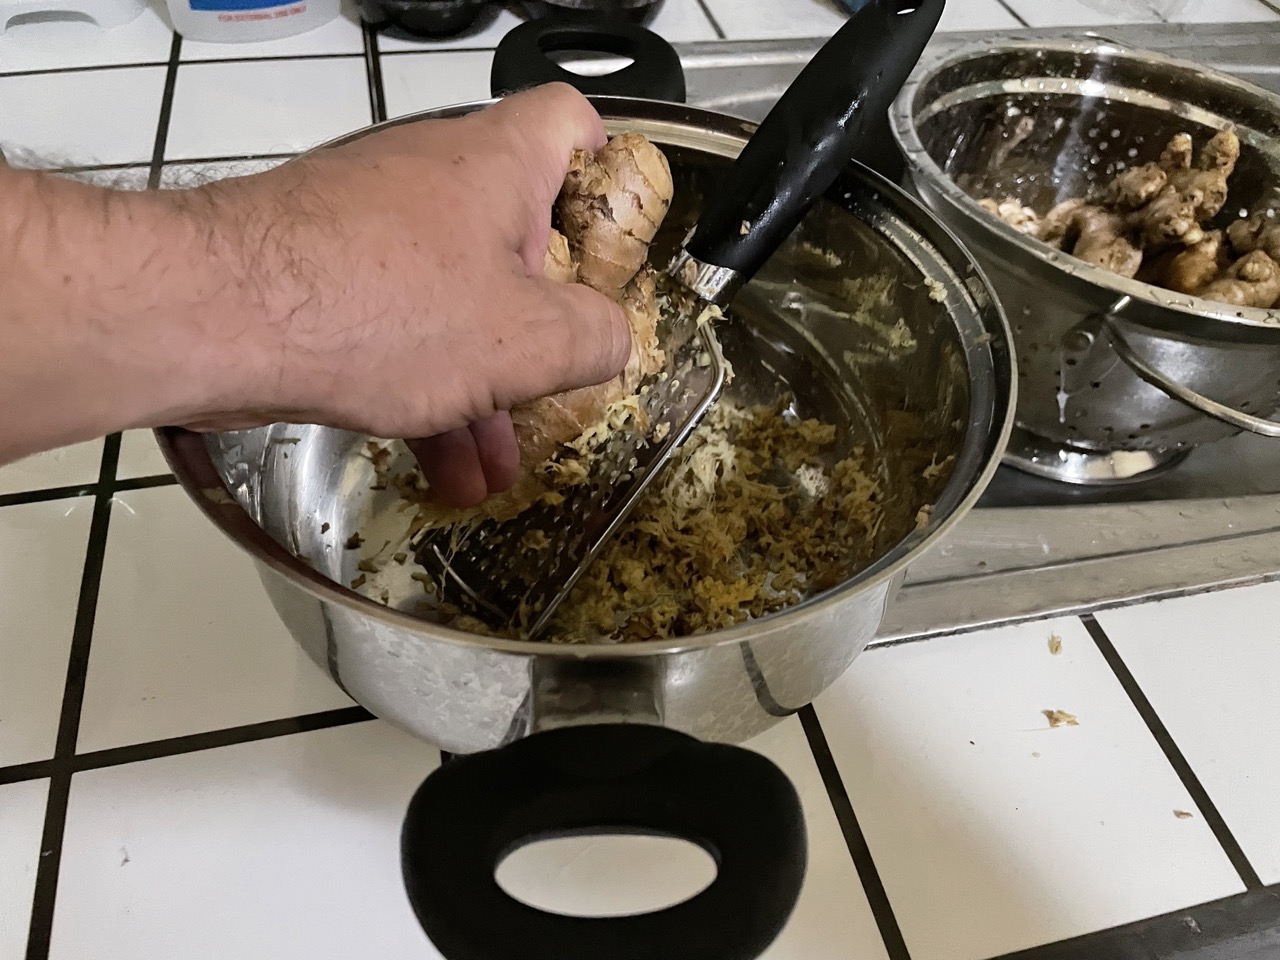
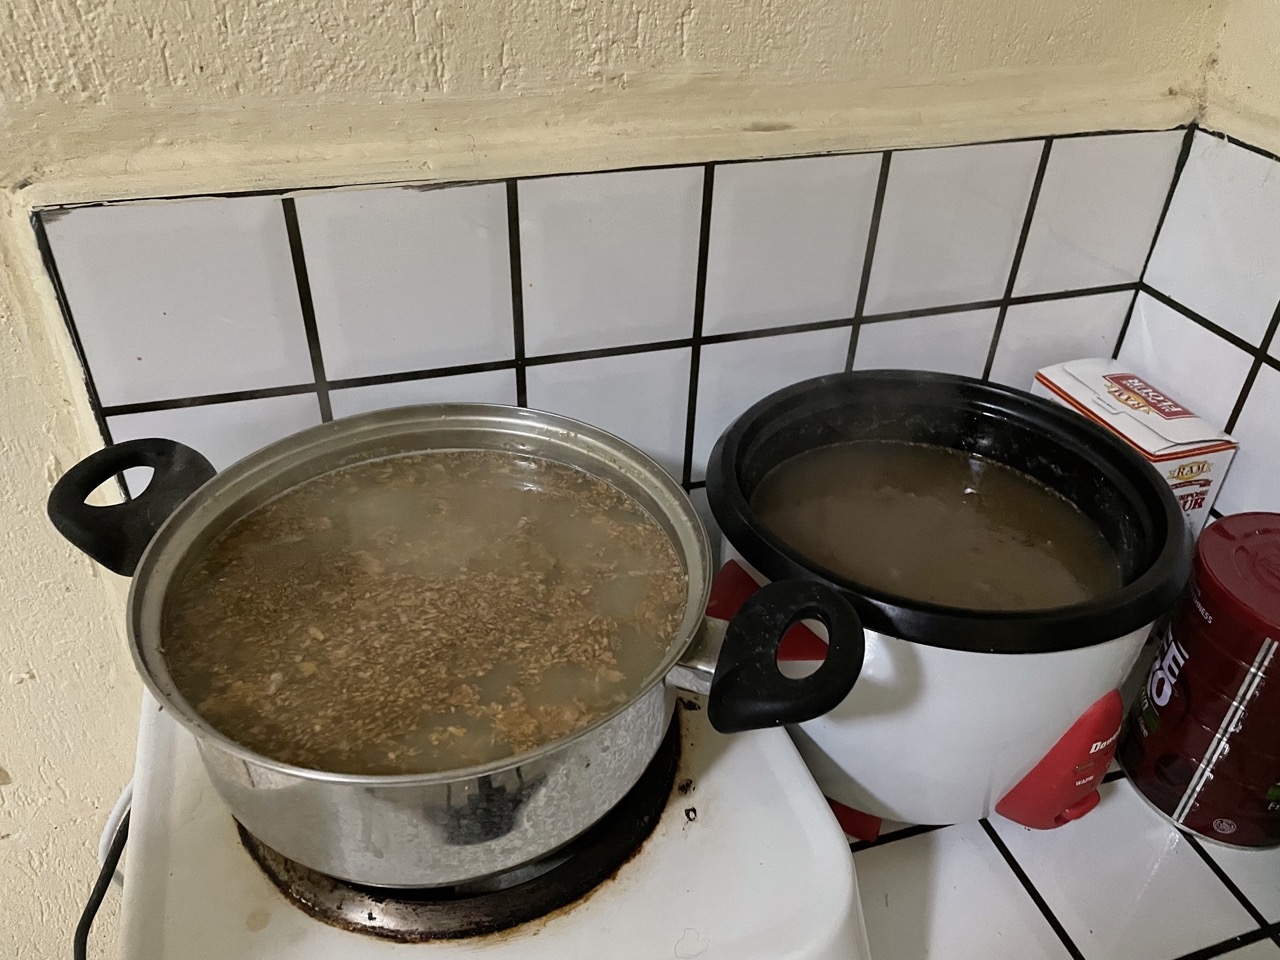
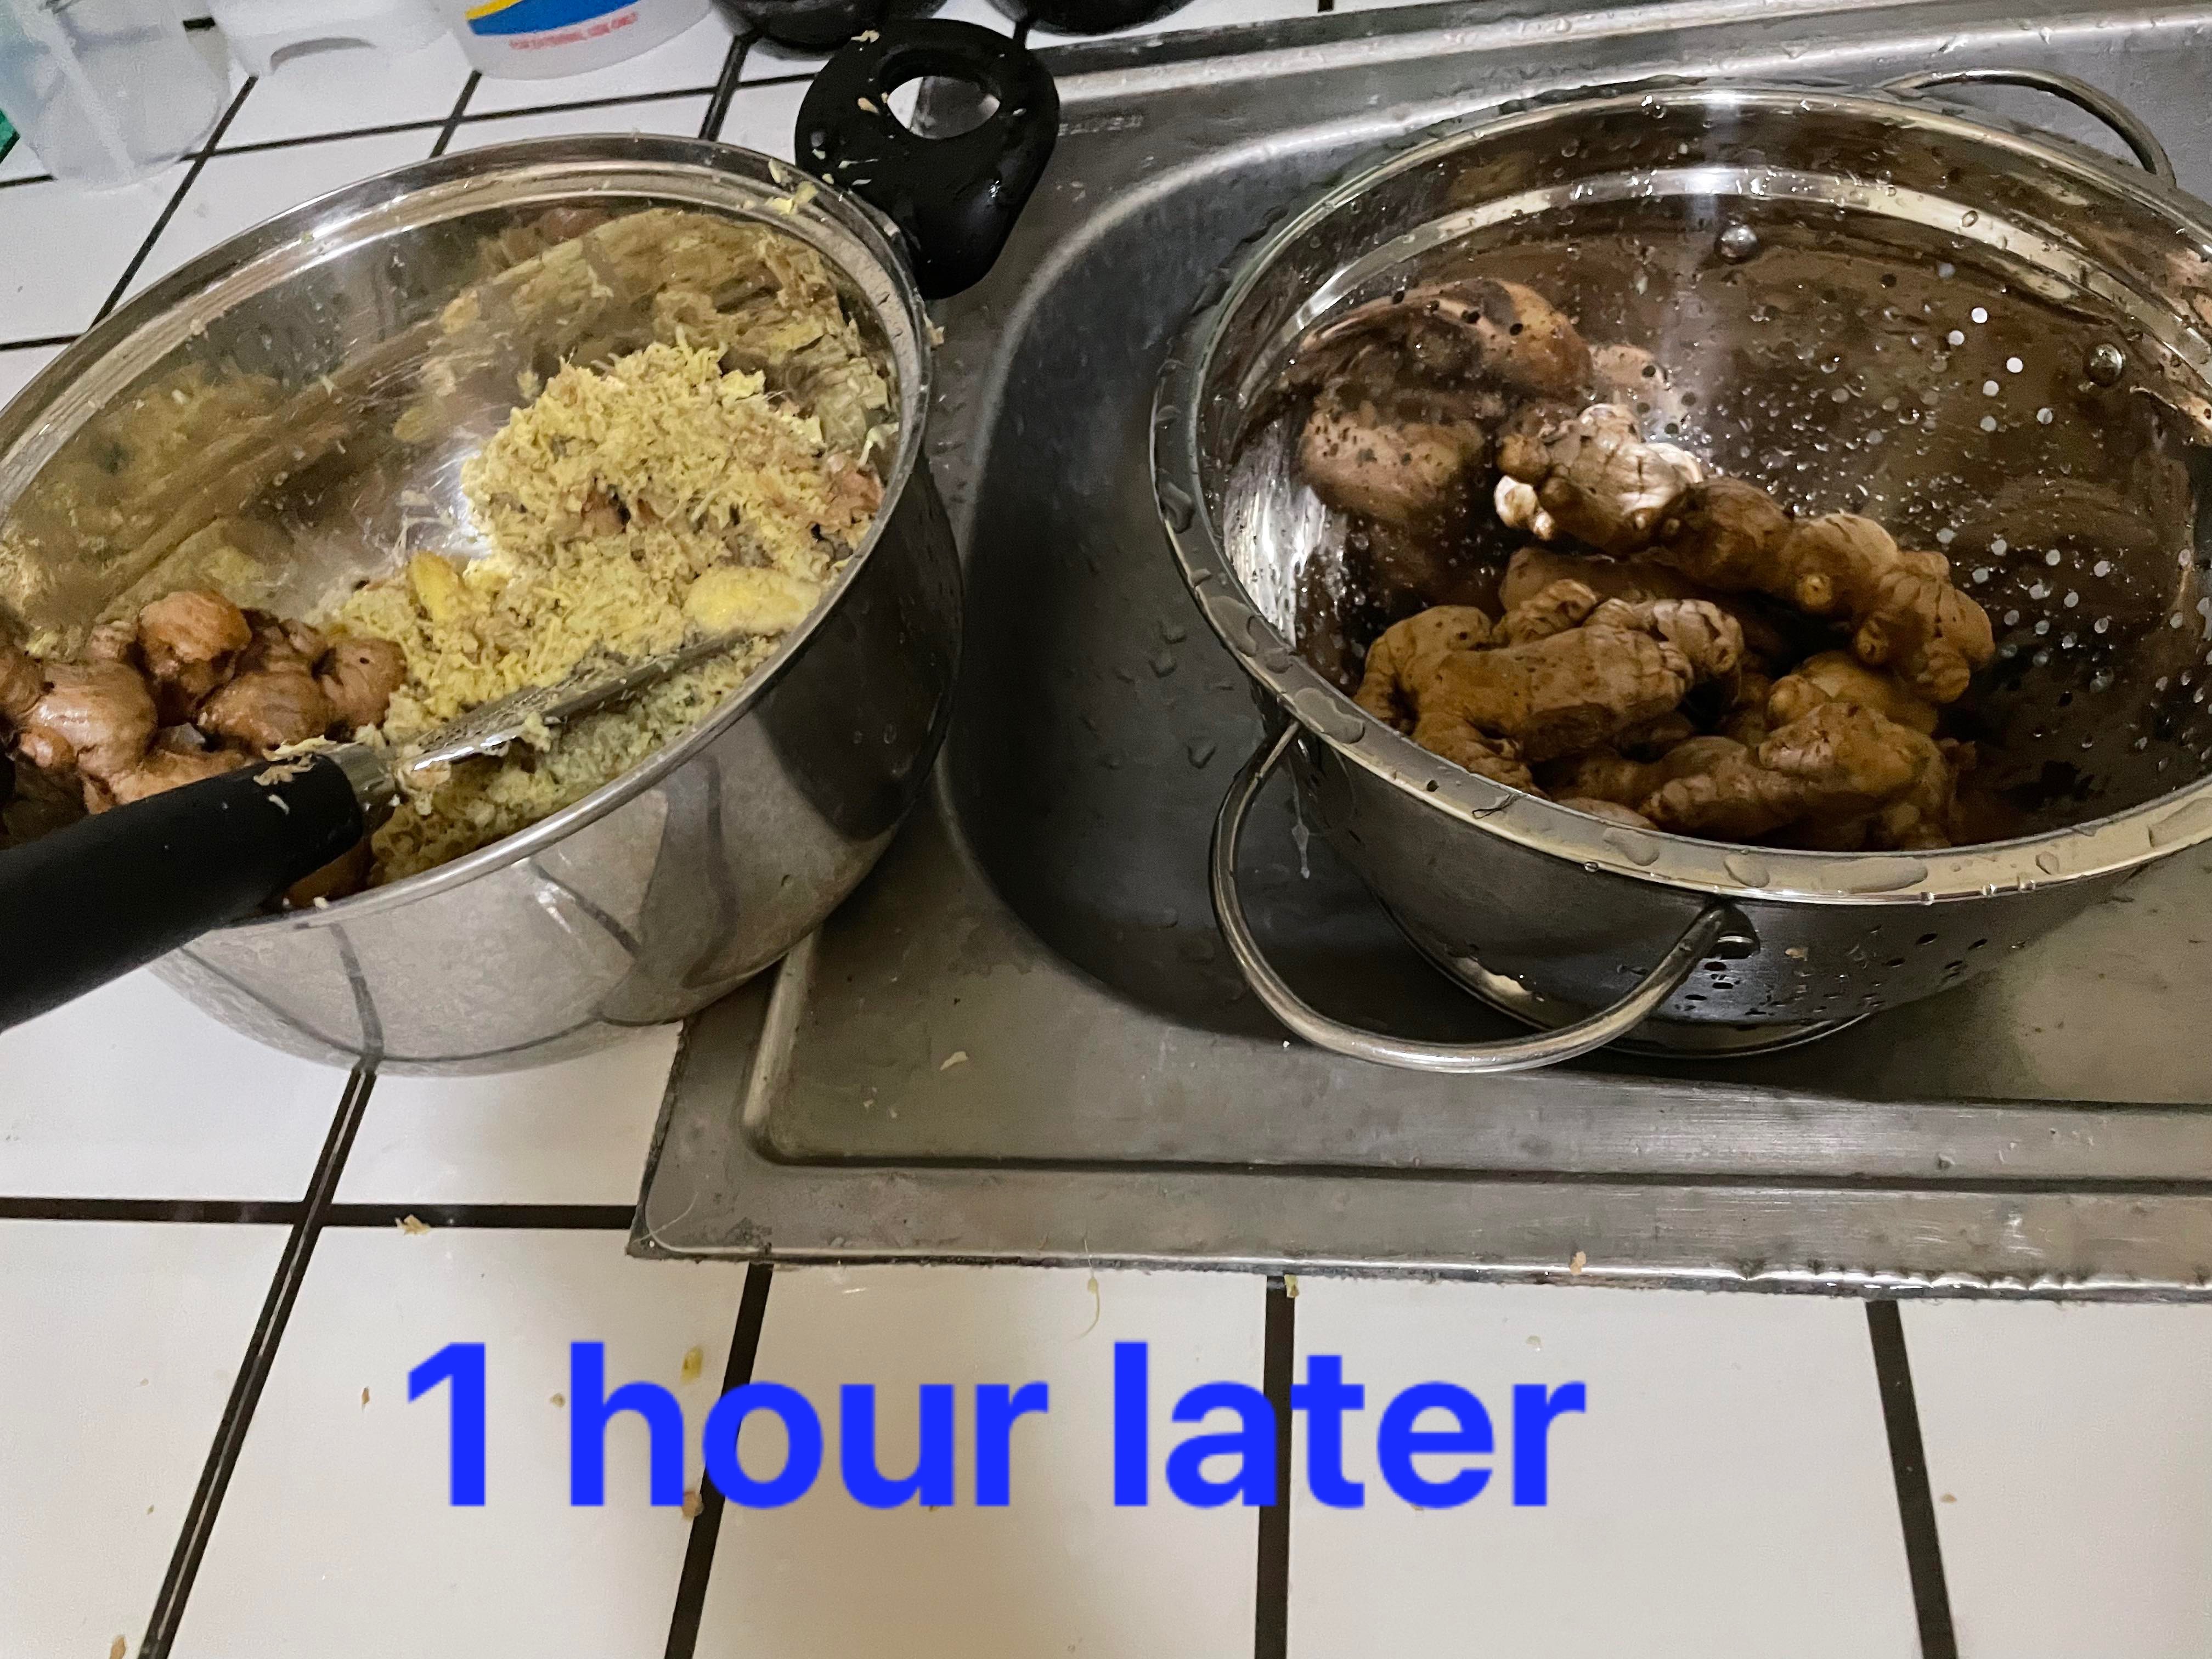
The brew day took longer than expected. Turns out that grating a kilo of ginger by hand is not so easy (However I found that using grated ginger is far better and produces a stronger ginger flavour than simply crushed ginger root)! Follow that with some very low-tech boiling, cooling, diluting and cleaning, and you have a fairly involved process ahead of you.
Brew Day:
- Sanitize all your utensils and equipment.
- Wash your ginger in fresh water.
- Grate, grate, grate!
- Boil ginger in filtered water for at least 10 minutes to sanitize. You may need to boil in multiple batches if your pot is on the small size.
- Strain the ginger, or scoop the floating pulp out with a spoon.
- Dissolve sugar into the still-hot strained ginger mixture. Boil again for 5 minutes.
- Cover and allow to cool. You just need the liquid to be cool enough not to warp your PET bottles.
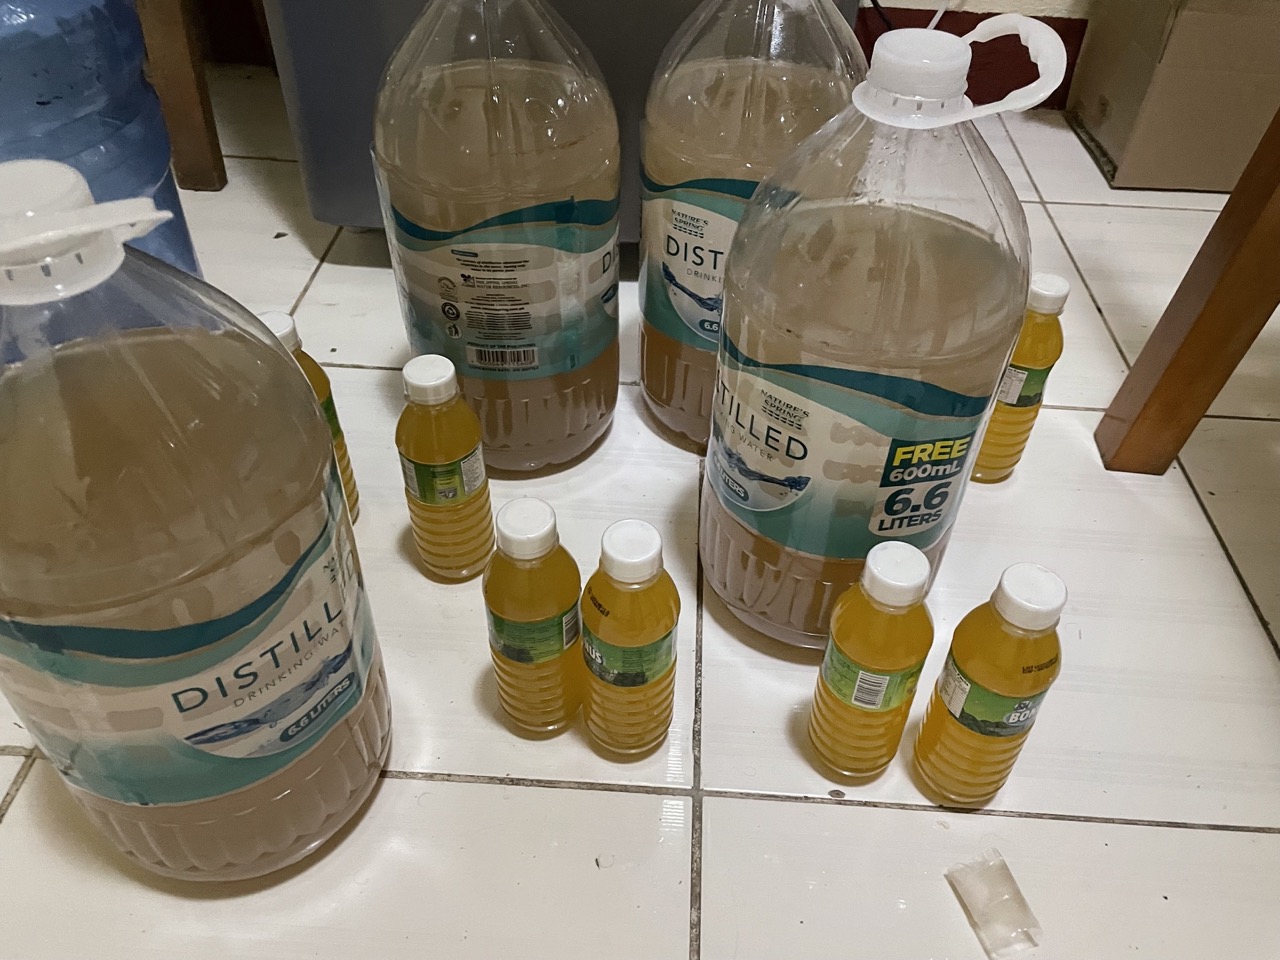
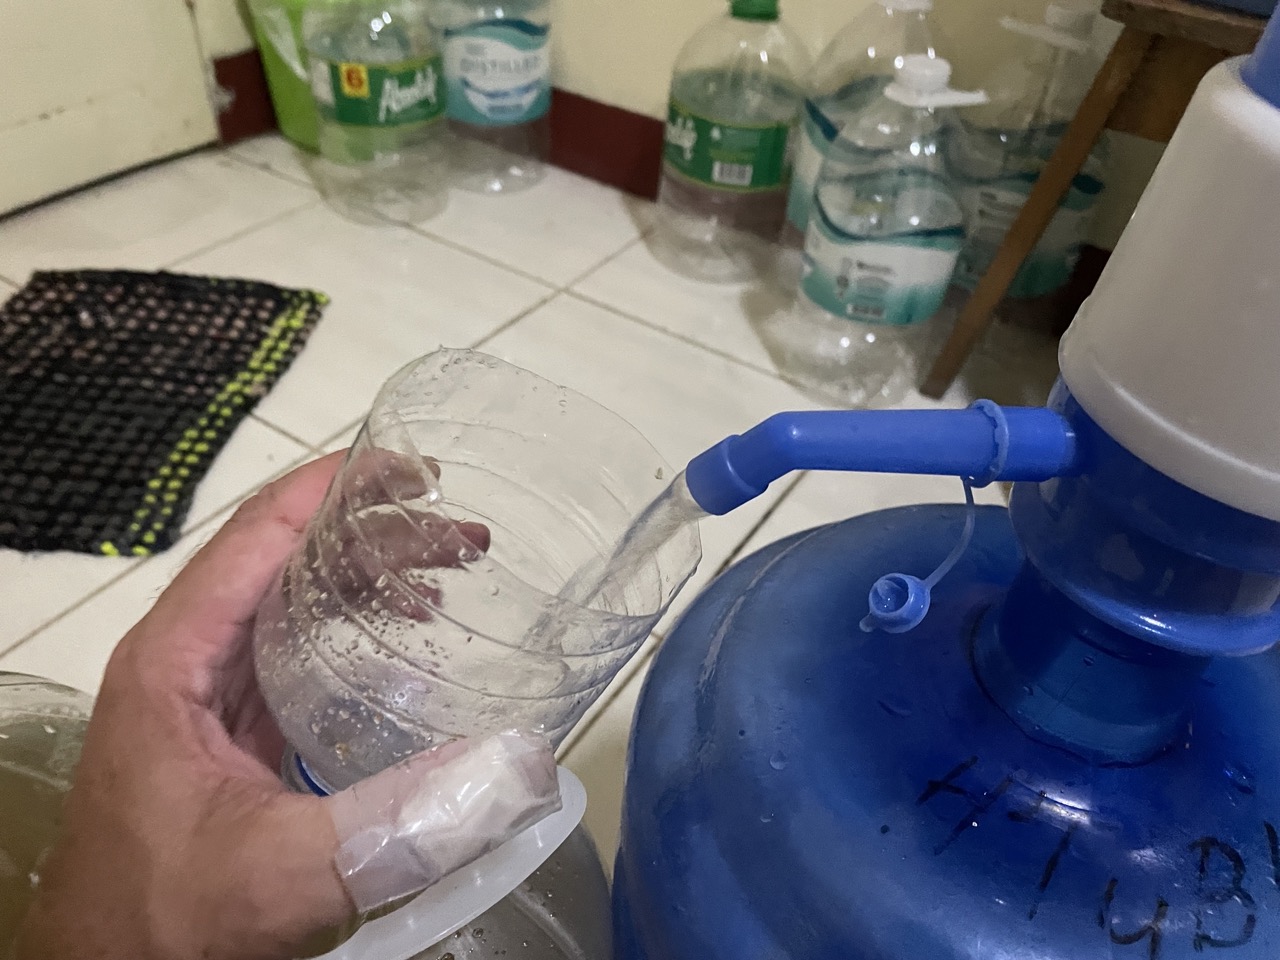
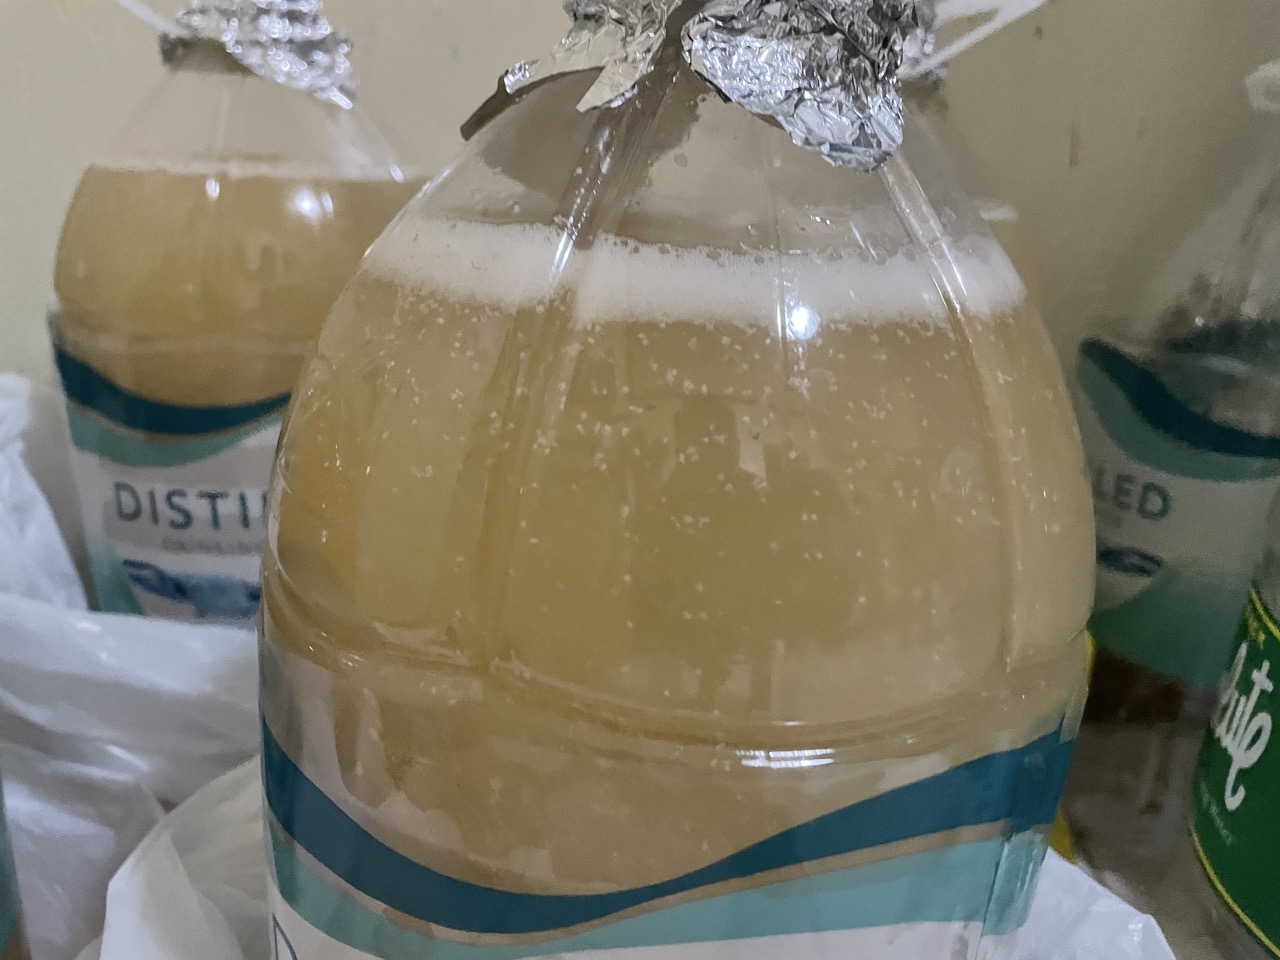
- Using a funnel, transfer cooled ginger extract into (sanitized) 6.6 litre bottles. I simply eyeballed the volumes to keep them roughly even.
- Add an equal amount of calamansi extract to each bottle.
- Top up with water to 6 litres per bottle. Leave the final 0.6 litres as head-space for foam to form.
- Sprinkle a liberal dose of yeast into each bottle. About half a tablespoon should be plenty for each bottle, no harm in adding a little more.
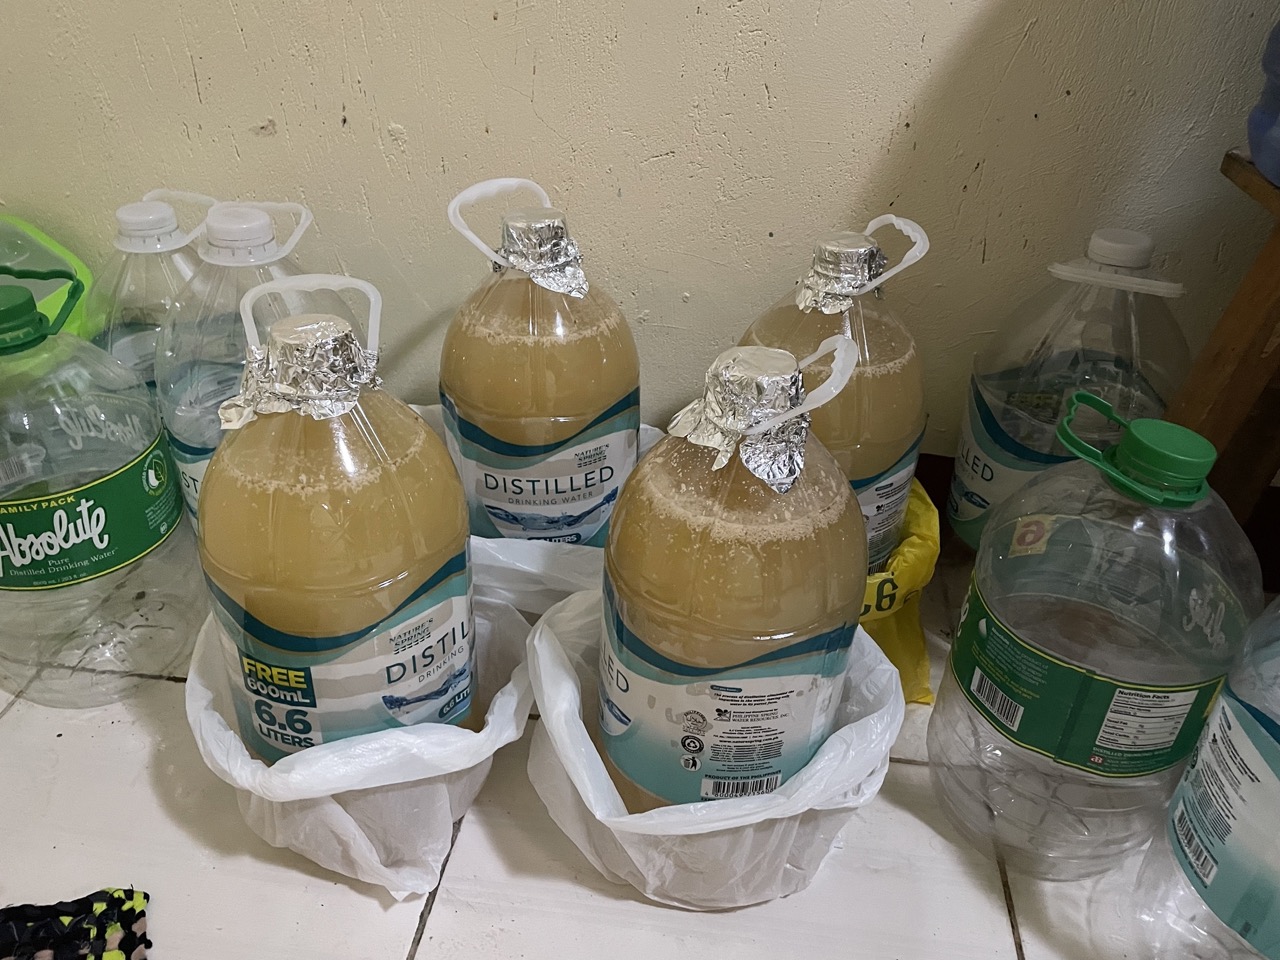
- Close the lids on top, then re-open them just a half-turn each. This lets the gas escape during fermentation, so your bottles don’t pop.
- Enclose the cap and neck of each bottle with sanitized aluminium foil. This helps prevent airborne contaminants getting in there.
- Store the bottles in a cool dark place. Around 18-24 degrees Celcius is ideal for healthy fermentation.
Conditioning Your Homemade Ginger Beer:
After a few days, you can see the yeast activity slowing down. What looked like a roiling boil now looks like a simmer. Sanitize 4 x 5 litre PET bottles, caps and a funnel. Now, slowly transfer the ginger beer from each full bottle into each clean bottle. You want to leave behind the sediment in the bottom of the fermenting bottles, and also avoid oxygenating the ginger beer on the way into the conditioning bottles, if possible.
Seal up the bottles, and this time, tighten the caps all the way. We are aiming to have the last little bit of fermentation occur in these conditioning bottles, and in doing so, trap the resultant carbon dioxide in there with them, creating a bit of fizz in the finished product. Try to keep the bottles conditioning at 18-25 degrees Celcius.

A couple of times per day, press on the bottles to feel for a little bit of give” in the plastic. The bottles should be about as firm as an unopened bottle of cola. Any firmer, or obvious signs of bottles ballooning,” and you should release the pressure a little. If needed, bleed the pressure by cracking the cap just slightly, and reseal once the gas has escaped.
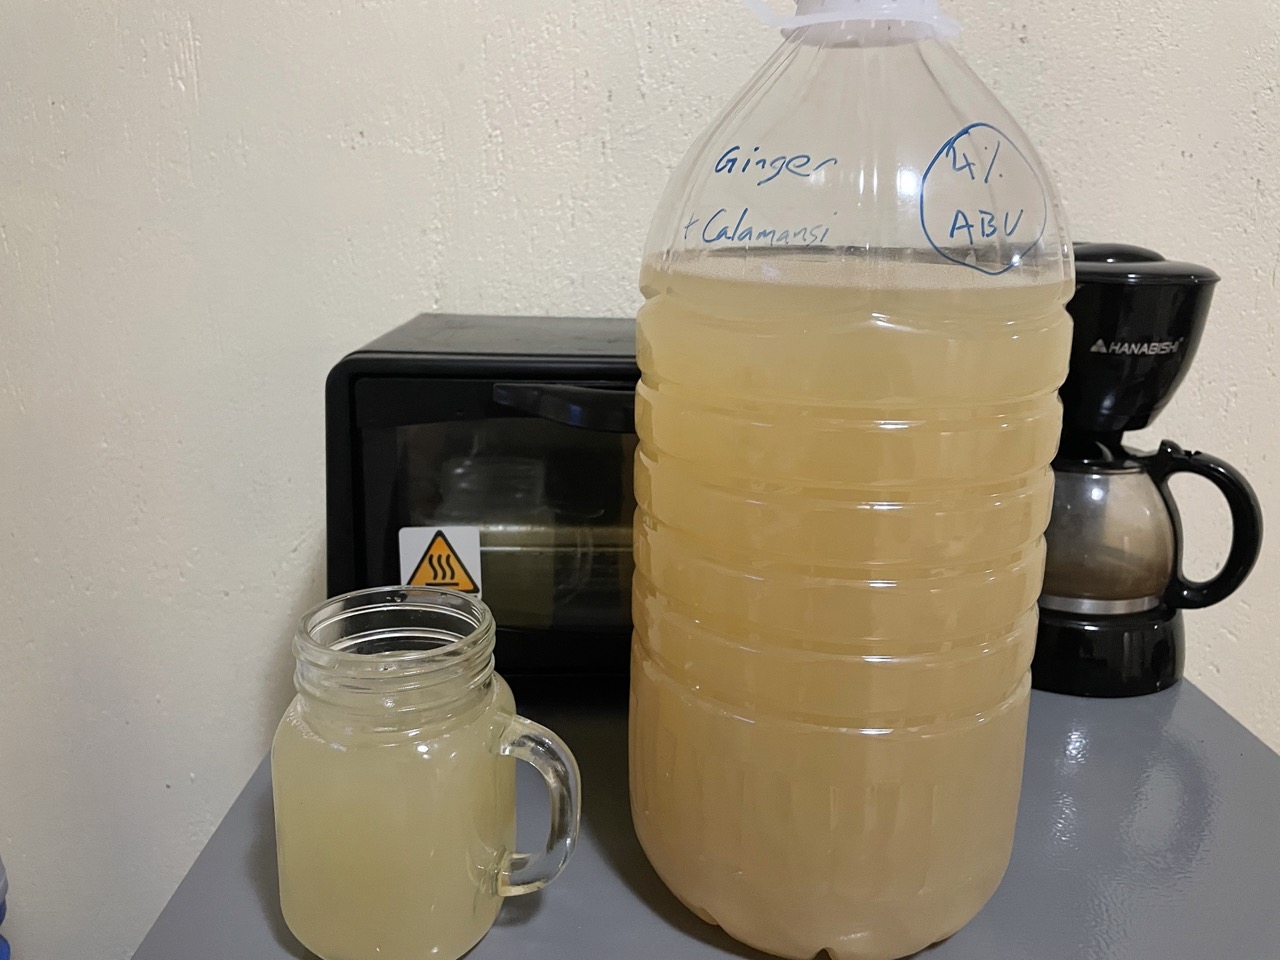
Once the liquid inside appears more clear, and you can no longer see bubbles rising to the surface, your ginger beer is ready to chill and serve.
Alternative Conditioning Method:
This batch was somewhat under-carbonated. This could be easily fixed in a future batch by changing it up slightly. Instead of transferring to conditioning bottles before primary fermentation is complete, one could wait until there are no more signs of fermentation. Since this is a ginger beer, slow extended fermentation can and does occur, so wait an extra day or two.
Now transfer the fermented ginger beer to conditioning bottles, as per the method above. Weigh out about 6 grams of table sugar per litre of ginger beer, and boil it in the minimum amount of water possible. Add this evenly to each of the conditioning bottles. The ginger beer is now undergoing a secondary fermentation, to produce co2 for a healthy fizz. Note that this will add approximately 0.4% alcohol by volume to your batch.
Pressure check your conditioning beer bottles using the same method above. Secondary fermentation should be complete in 10-20 days. Again, wait until you can’t see any bubbles and the liquid has cleared somewhat.
Making Ginger Beer Easier
This experiment was a little bit of a personal challenge. I really wanted to use zero equipment, but apply knowledge and skills to replace technology. However, it was quite difficult, and the results were only “okay.” Safe, but could be better.
To make life easier, eliminate guesswork and improve results, here is what I would add:
- A large spice bag, for extracting the ginger without leaving pulp in the mix.
- A hydrometer, for measuring alcohol content and deciding when to condition.
- A set of kitchen scales, for accurate measurements.
- A larger pot.
- A food processor!
Of course, if you really want to get stable results, you can use a cheap, basic brewing kit. Its just as good for ginger beer as it is for beer, and you’ll have a solid setup for easier (and more repeatable) results. Plus, you’ll know your actual final alcohol content!
CHECK OUT: The Benefits of Drinking Sour Beer
Cheers!
Overall, this project was challenging but fun. The flavour was a good sweet n sour balance, with a solid spicy kick from the ginger. I really wanted a higher level of carbonation, but the overall result was actually better than expected.
Now if you want a non alcoholic ginger beer recipe then this might not be the one for you. In any case, the Ground Crew seemed to appreciate several gallons of ginger beer appearing suddenly in their posession!
Read next: The Science Behind Beer Koozies: How They Keep Your Beverage Cold!, Home Made Vs. All-In-One Brewing Systems and How To Carbonate In Mini Kegs
Nice
Thank you sir!