


A good fermentation plays a major part in the quality of your finished product, and a healthy, active yeast is key to a good fermentation. You want as little lag-time as possible between adding (‘pitching’) the yeast and the yeast becoming active.
Using the right beer yeast starter recipe gets your yeast active and hungry, so that when you pitch the yeast and it gets to work in your fermenter immediately. In fact, this is also true for wine, cider – even baking bread!
How Important is a Homebrew Yeast Starter?
If you consider that a batch of homebrew is less important than a batch of commercial beer, then 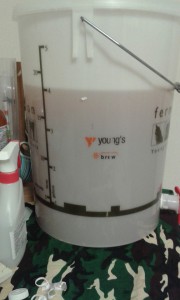 not very important. However, if you care about the quality and consistency of your homebrew, then using a starter may be much more important than you think.
When you pitch yeast into a fermenter, there is a lag-time before the yeast becomes noticeably active. Basically, the yeast needs to wake up and start eating sugar, then start dividing into more yeast and eating more sugar. This lag time can take up to a day, and a long lag time can have some detrimental effects:
- Weak fermentation
- Off flavors in your beer (it’s true!)
- Chance for other organisms to grow before yeast becomes active
Using a starter, you can greatly reduce the lag time and therefore have a safer wort, a healthier fermentation, and a better finished product.
Different Pitching Methods
Just before we go into the yeast starter instructions, you should make sure you understand all the available options. Some of these may be the best way for your particular brewery.
Pitching Dry Yeast
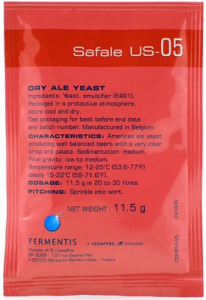
Again, this is not the ideal approach. However, if you are going to pitch dry, make sure you use enough yeast for your batch size. 11-15 grams (about half an ounce) of dry yeast is ideal for a 20 liter batch (five gallons).
You also want to make sure that the wort is at your correct fermentation temperature before you pitch. Many home brew instructions tell you to pitch at 25°C (77°F), however if you are using the correct amount of yeast you can disregard this and pitch at your chosen fermentation temperature.
Rehydrate Dry Yeast
As the name suggests, you can rehydrate your yeast prior to pitching. This does help reduce the lag time, but carries risk of infection. Use boiled water, then cool it to pitching temperature and add yeast. Make sure you do this all in a sterilized container – sterilize everything that will come into contact with the beer or the yeast.
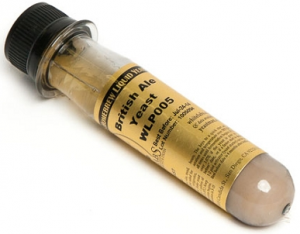
Pitching Liquid Yeast
Available from AIH
This is a much better option than pitching dry yeast. Assuming that the yeast is fresh and healthy, all you need to do is get the liquid yeast to pitching temperature and add it straight to the wort.
Since this is not an ideal world, however, your yeast may have been sitting in a brew shop or your refrigerator for some time after being produced, so it may be less ‘viable’. Yeast viability is the number of live cells versus the number of dead ones. So, if you have a reduced yeast viability, pitching liquid yeast without a starter is only a little better than pitching dry yeast.
White Labs have a great range of prepackaged liquid yeasts.
Using a Starter
By using a liquid medium and providing your yeast with something to eat and a little extra time before it gets to the wort (or other fermentables) you give it time to wake up and start the fermentation process early, so that it is all ready to go by the time it reaches the wort. You also help build up the yeast cell count, which means that your yeast will build up to a vigorous fermentation much more quickly.
Since you don’t want your wort sitting around without yeast in it (which increases the risk of infection) you need to pitch your yeast as soon as the wort is ready. If you try to make a yeast starter after you finish cooling your wort to the fermenter, you are going to have a couple of hours wait before the starter is ready!

Available from AIH
The ideal yeast starter is the same wort that you will be fermenting it in, so that cells with a preference for your wort type will be stronger by the time they reach the fermenter (natural selection). However, unless you are doing back-to-back brews, this may not be practical. Therefore, you should use a medium that closely resembles the fermentable you are using: barley malt for most beers, Wheat malt for wheat beers, fruit juice for a cider, honey for a mead, etc.
Wyeast have a really cool ‘smack pack’ for home brewers that contain a yeast and a liquid starter, kept separate in the same foil pouch – you just smack the pouch to open the inner packages and mix the two, then wait until the pouch has inflated from yeast activity
Basic Yeast Starter Recipe
This one is a multi-purpose beer starter for dry yeast or liquid yeast with low viability.
Ingredients:
- 30g (about 1 ounce) Light Dry Malt Extract (DME)
- 1 cup of water
- 1 sachet dry yeast (or liquid equivalent)
Utensils:
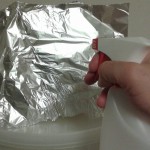
- Spray pack with liquid sanitizer
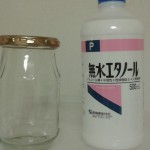
- 500ml (1/2 quart) glass jar with lid
- Measuring jug
- Aluminum foil
- Thermometer
Method:
For Grain Brewers: ideally you should start this process before you mash in; at the very least before the boil.
For Extract and Kit Brewers: try to do this around 3-6 hours before you plan to start your brew.
- Sanitize everything thoroughly using your spray pack.
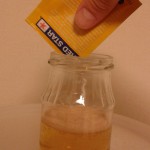
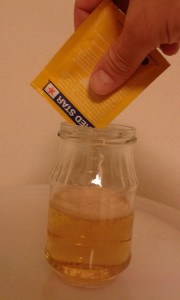
Adding yeast to starter
- In your measuring jug, dissolve DME into boiling water and cover with aluminum foil until cool.
- When cooled to desired pitching temperature, add to glass jar along with yeast.
- Place lid on jar. Do not seal lid, just place on top.
- Cover jar and lid with aluminum foil.
- Keep temperature constant. You will soon see yeast become active and show signs of vigorous fermentation.
- Once wort is in fermenter at correct temperature, you will be able to pitch the yeast from the jar into the fermenter.
Tips for Temperature
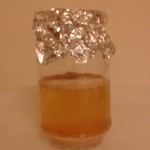
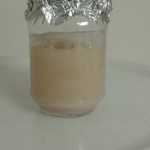
Yeast stater
- To cool the starter before adding yeast you can place it in the refrigerator or even in a cold bath of sanitized water (do not submerge the whole jug).
- If you need to warm your starter you can keep a small bath of warm (sanitized) water on hand. Simply place the jug/jar in the warm bath until temperature is correct. Do not submerge, and do not use water above 35°C/95°F.
- If the brewing location has controlled temperature (like reverse-cycle air conditioning), you should set the room temperature to pitching temperature. This will help keep the starter constant.
Active yeast starter
Wheat Beer Starter:
Simply use the same recipe as above, but substitute Light DME for Wheat DME.
Wine or Cider Starter:
Use the same method and utensils, but replace the malt and water with one cup of the same juice or must that you will be using as your fermentable – apples for apples, grapes for grapes.
Starter for Mead:
Just replace the malt with a tablespoon of honey. Honey can take a long time to ferment, so you may want to make the starter a full 24 hours before use.
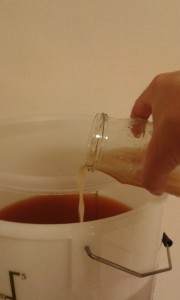
Pitching the Starter
Cheers!
I hope you have found this guide useful! You can find most of the utensils as well as White Labs liquid yeast and Wyeast Smack packs from most good suppliers. Try Adventures in Homebrewing or the directory for home delivery.
Please leave a question or comment below to share any experiences, ask for advice or simply have your say!
Read next: How A Conical Fermenter Works
Jesse, I wanted to tell you how much i enjoyed your site. As a person who enjoys having a beer, i find it interesting learning more about how its done and the different methods. Ill be sure to let my friends know to check your site out. Thanks for the knowledge.
Hi Adam,
Thank you so much, glad to know you are finding this useful!
I think that when you make your own beer, you are almost certainly planning on drinking it yourself too, so obviously you need it to be as good as possible. Making beer is a tricky process, with many things to get right to get the best results.
This is a very well written article, easy to follow, and I am sure that it will help produce many great tasting beers.
Hi Molly,
Thank you very much for your reply. The yeast you use and the health of your yeast starter are vital to the success of your brew.
Now that you have read up on yeast starter recipes, try taking a look at conical fermenters. You’ll be impressed with the results!