If you have come to this page, you have probably been considering starting a home brewery. Or, perhaps you are already brewing and are ready to take a step up to all-grain brewing. You might even be trying to learn how to mash beer in the hopes of employment in a local brewery. Whatever your situation, these all-grain brewing instructions are universal.
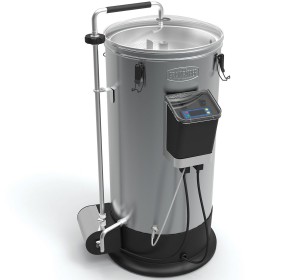
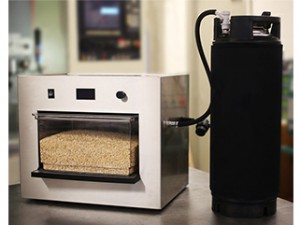
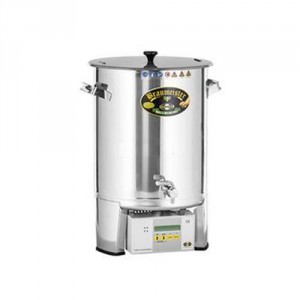
If you are just starting out, you are going to need a basic fermentation kit – please check out this page and then read up on fermentation here. In addition to your fermentation gear, you will need a “brewhouse.” This is the name for your all-grain brewing setup that gets the goodness out of your malted grains and hops and ready for fermentation. For comparisons on various brewhouse equipment, click here – although to make brewing as easy as possible, I recommend any of the following all-in-one brewhouse systems:
What is Mashing?
Mashing is the process of mixing your crushed malted grains with water and converting the malted starches into the right types of sugars for your yeast to eat. This conversion is necessary because the starch that is in unmashed grains are not yet fermentable – they are complex chains, which make them too big for yeast to ferment.
Contained within the malt, however, are several chemicals called enzymes which help break down the starches into simple carbohydrates that can be fermented. These enzymes all go to work on the starches at different temperatures, chopping them into smaller fermentable sugars.
To activate the right enzymes, mashing needs to occur at specific temperatures for specific periods of time, giving each of the chosen enzymes a chance to work on the starches. This takes place in the ‘mash tun’, a vessel that has a false bottom, which allows for the liquid to be drained off and separated from the used grain after mashing. A full mash typically takes between 45 minutes to two hours and results in a highly fermentable liquid called wort.
RELATED: How to Filter Beer
How to Mash Grains:
In very basic terms, this is how the process works:
- Grains are malted to produce starch
- Malted grain is crushed and mashed
- Mashing activates enzymes
- Enzymes break down starch into fermentable sugars
- Yeast eats fermentables and produces alcohol
To make this process easy to understand, John Palmer (we’ll get to him) describes the enzymatic activity as a box full of gardening tools (enzymes), each of which break up a different part of a branch (starch) into easy to use twigs (sugars). You can find more from John Palmer in his book ‘How to Brew’, which is available on Amazon.
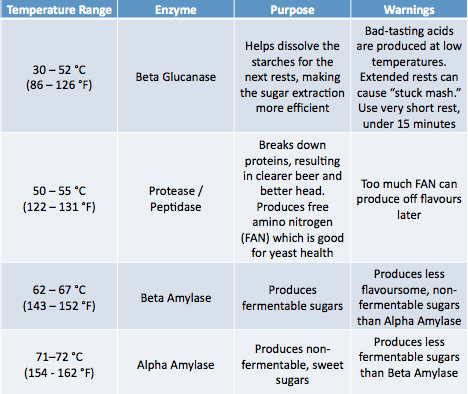
Holding a specific mash temperature for a specific amount of time is called a ‘rest’. Variations include enzyme rest or mash rest. The mash temperature table below outlines the temperature ranges that are in use today and how they work:
Modern malt available from most reputable suppliers is very highly converted, which means it’s so good that the rests listed in the table should be enough for almost any beer you want to make. In fact, many brewers will go straight to a single temperature between the alpha and beta amylase rests, entirely skipping lower temperatures.
When first mixing grain and water (‘mashing in’ or ‘doughing in’), you will want to hit your first temperature rest right away. Use a brewing calculator to help get the water to the right temperature for mashing in.
Go through the mash rests, taking care to follow the recipe. If you are designing your own recipe, you will want more alpha amylase for a sweet beer, less for a dry beer. More beta amylase makes for better fermentation. You’ll need plenty of alpha and beta amylase activity, and getting the balance right will determine much of your beer’s character.
When you have finished your mash, raising the mash temperature to 78ºC will denature any remaining enzymes, preserving your wort as-is while you ‘mash out’ (end your mash).
Other Factors
There are a few other main contributing factors to be aware of in your mash which will affect the fermentation and therefore the final outcome of the beer.
PH Balance of Your Mash:
The PH of your mash affects the quality of your enzyme activity and the eventual PH of your fermentation which will affect the health of the yeast. If you remember your high school chemistry, 7 is PH neutral. Anything below 7 is acidic, anything above is alkaline. A good mash should be between PH 5.2 and PH 5.4. This is usually achieved without needing to do anything, so you will rarely have to monitor this too carefully.
Mash Thickness / Liquor to Grist Ratio:
Liquor is your water and grist is the word for crushed grain. This ratio actually plays an important role in mashing. Liquor to gris ratios range from very thin (at around 4 liters of water per kilo of grain –4:1) to very thick at 2 liters of water per kilo of grain (2:1). Most home brewers save on space by using a thick ratio of 2.1:1 (which works out to about 1 quart of water to 1 pound of grain).
Thicker mashes protect the enzymes at higher temperatures, which means you can actually do an alpha amylase and beta amylase rest at the same time, at about 66 or 67ºC. However, on the flip side, you are likely to get a lower extract efficiency – less fermentable wort per brew.
Thinner mashes have higher extract efficiency, but are much harder to control due to enzyme instability. If you are using a thin mash, you need to have very precise temperature controls and excellent timing.
Quality of Ingredients:
In modern times, most malts available to home brewers and micro brewers are of a high quality, however you may still notice variances in your results even though you did everything exactly the same – that is the result of agriculture and malting process. There is no easy way around this, but thankfully it is very rarely an issue.
Lautering and Sparging:
Lautering (draining the wort) and sparging (rinsing the grains) are technically done after the mash. However, if you have not denatured your enzymes by raising the mash temperature, and if your sparge is lower than 78ºC, you may still have some enzymatic activity during this stage of the brew. As with everything in brewing, accuracy and precision will help prevent unexpected results.
RELATED: How to Build the Perfect Homebrewing System from Scratch
Common Mashing Methods:
There are actually many different methods of mashing, although these days only a few are widely used. They do have quite an impact on beer flavor, so they are worth knowing.
Single Infusion Mash
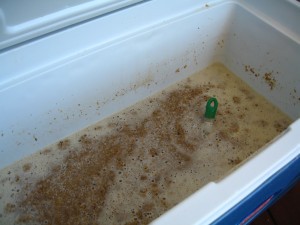
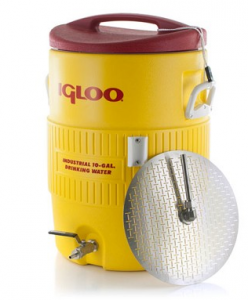
An easy and effective method, the single infusion method simply involves starting at your chosen mash temperature (most commonly at 66.7ºC) and holding at that temperature for the entire mash. This usually involves a well-insulated mash tun. For home brewers, the most common option is a converted cooler.
Single infusion mashes are best done thick, at under 2.5:1 liquor to grist ratio. About 1.25 quarts to one pound works a treat.
Multi Rest Infusion Mash / Step Mash
Usually the choice of experienced home brewers and professionals. Step mashes involve starting at a low temperature, holding for the first ‘step’, then raising the temperature and holding at the next step and so on until the mash is complete. Step mashing greatly increases the ability to control the outcome of a brew.
Step mashing is done either by heating mash tun directly, whether by gas, fire, electric elements, or steam jackets, or by adding boiling water to the mash. To calculate the amount of boiling water to add, use a brewing calculator.
You can add boiling water for each step with a converted cooler mash tun, but your liquor to grist ration will be different from the start of the mash to the end of the mash. That’s why I prefer electric brewing systems like the Grainfather, Braumeister, or Zymatic.
Decoction Mash
This method was developed as a way of improving results back when malt was commonly under-modified and unreliable, but it is still used in many traditional European breweries. The flavor of decoction recipes is somewhat unique, so some home brewers and new age commercial brewers still choose to use this difficult method.
A decoction mash is a step mash, but instead of direct heat or boiling water to raise the temperature, a portion of the mash is moved to a kettle and boiled, and adding this back to the mash is what raises the temperature for the next rest.
Decoction mashes deserve an entire article to themselves, but here is the basic info needed: a decoction mash will increase a brew day by anywhere from 1 to 3 hours, but the flavor pay-off may be well worth the while. Those old fashioned, very malty European lagers? Often decoction mashes.
Double Mash / Adjunct Mash
Like decoctions, adjunct mashes deserve their own posts. These are used when a high percentage of unmalted ingredients are being included with the mash, usually unmalted grain. The adjuncts are mashed separately at different temperatures and added back to the mash when it’s time to alter the temperature.
Complicated stuff, but for now you are very unlikely to have a need to mess around with this procedure.
Example Mash: Pilsner
This is an actual step mash schedule I have used commercially, using a direct heat applied to the mash tun via steam jackets.
Liquor to grist ratio:
3:1 (low-medium thickness, 3 liters per kilo, or roughly 1.5 quarts per pound)
Mash Schedule:
- Mash in at 40ºC (beta glucan rest)
- Hold for ten minutes
- Raise to 67ºC (saccharification rest – alpha and beta amylaise)
- Hold for 45 minutes
- Raise to 72ºC (start to denature enzymes)
- Hold for ten minutes
- Raise to 78ºC (halt enzymatic activity)
- Mash out
Because it takes time to raise the temperature using direct heat, the process actually looks like this:
A short beta glucan rest at 40ºC helps dissolve the starches, but it takes a while to raise the temperature to the next rest. The medium-thick mash means a single saccharification rest is sufficient for both alpha and beta amylase. Activity is slowly halted with a step at 72ºC and then halted at 78ºC, when we begin lautering (draining the wort).
CHEERS!
CHECK OUT: How to Keep Beer Cold While Camping
I hope you have found this post useful and interesting to read! Don’t worry too much if it seems complicated – just follow your recipes at first and come back to this page when you are trying to develop recipes of your own.
If you need a recipe to follow, why not join my newsletter on the left and get a free book of recipes?
If you are still confused about anything above or you just have something to add, shout out in the comments section and I’ll respond ASAP!
Read next: Common Mistakes When Keeping Beer Cold and Finding the Best Beer Koozies for Bottles And Cans: Whats on Amazon?



I once tried to make my own wine using a kit, and it wasn’t anywhere near as involved as this. Although I have to say the wine was horrible.
I am interested in making something you can actually drink and I like your beer recipes idea in your newsletter, so I will sign up to that.
Some great information, and one to print out and look at later.
Thank you very much Ruth!
Wine is mostly about agriculture, but beer is all about process.
You can sign up here: Beermail
Cheers!
Hi Jesse,
I love your article on brewing beer. I’ve always wanted to try and brew my own beer. I have to admit, it’s much easier going to the convenience store and pick up a six pack. Anyways, it is an interesting topic. I saved your site to my favorites for the day I’m finally ready to give brewing beer a try.
Jack
Thanks Jack!
I hope you do give it a try, you may end up discovering that you no longer even WANT that six-pack from the store 😉
When you are ready to give it a try, please check out the Directory for details on where to buy your kit.
Cheers!