


You should learn how to keg your homebrew if you’ve been homebrewing for a while and discover that you’re growing weary of cleaning and sterilizing hundreds of bottles when it comes time to bottle.
Installing a kegging system does require a one-time investment, but the time you’ll save may make it worthwhile. Dealing with dozens of bottles is significantly more difficult and time-consuming than sanitizing a keg.
Kegging offers benefits beyond eliminating bottle cleanup. Since air doesn’t remain in touch with the beer in the keg and is replaced by CO2, draft beer tastes fresher than bottled beer. Additionally, when pouring your beer, you won’t have to be concerned about any sediment from the bottle’s bottom.
Additionally, the quantity of carbonation in bottled beer can differ and is influenced mainly by the priming sugar you add.
Homebrew fermented kegs don’t require adding sugar because the carbonation is already present and is simple to customize.
You don’t have to wait as long to get to the good stuff while drinking kegged beer because it carbonates more quickly than bottled beer.
Choosing Your Equipment
When you can homebrew kegs, why bother bottling them? Kick those bottles to the curb and pick up some Cornelius or “Corny” kegs. You won’t ever have to spend all day bottling beer again. Buy some extra o-rings and poppet valves if you already have a homebrewing keg system to avoid having a leaky keg right before the big celebration.
The first step in getting your kegging system set up is choosing the right equipment. Several different components make up a complete setup, and it can be easy to get overwhelmed by all the choices. But don’t worry—we’ve got you covered! Consider these components when selecting your equipment:
Kegs
When choosing a keg for your homebrewed beer, it’s essential to consider both size and material. The size of your keg will depend on how much beer you plan to brew; if you’re starting, you’ll want to choose something small. As far as material goes, stainless steel is typically the best option because it is durable and easy to clean.
CO2 Tanks & Regulators
You’ll need a CO2 tank and regulator to carbonate your beer correctly. When selecting a tank, ensure it is compatible with your regulator; otherwise, you could end up with an incompatible connection that won’t work correctly.
Also, check how much CO2 pressure your regulator can handle before making a purchase; too high of pressure can cause leaks or damage your equipment.
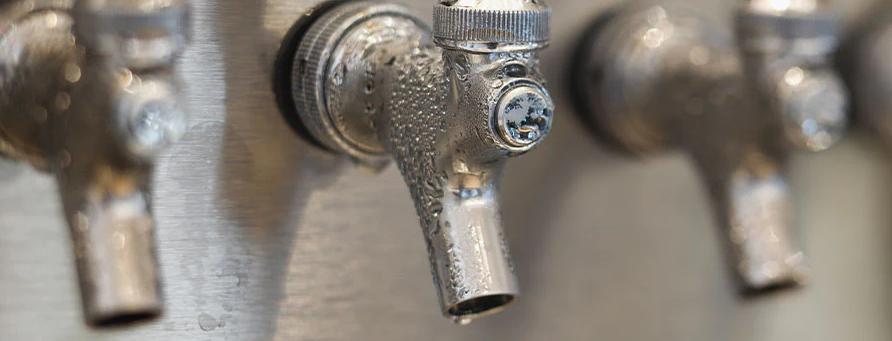
Faucets & Tubing
Faucets allow you to dispense your beer from the keg without opening the lid each time, while tubing makes it possible to transfer carbon dioxide from the CO2 tank into the keg. Ensure that both pieces are made of food-grade materials so they won’t contaminate your beer.
Setting Up Your Equipment
Once your equipment is gathered, it’s time to start putting everything together!
Here’s a quick overview of what needs to be done for you to begin enjoying delicious homebrewed beer from your very own kegging system:
1. Connect the faucet and tubing according to instructions provided by the manufacturer—this should not be difficult as long as all pieces are compatible.
2. Attach one end of the tubing from step 1 into the CO2 tank and secure it with clamps or screws (depending on the type of connector used). Tighten until secure, but not too tight—you don’t want any leaks!
3. Connect the other end of the tubing to either side of the regulator (make sure which side is connected isn’t indicated!), then tighten securely again using clamps or screws as necessary.
4. Place the CO2 tank onto its stand away from direct sunlight and heat sources (this ensures safe handling and storage), then connect its valve release knob to its hose adapter (if necessary).
5. Attach one end of the tubing onto either side of the faucet, then connect another end to the bottom port on the keg; tighten securely using clamps or screws (as needed).
6. Turn on the gas supply valve located at the top port on the keg, then adjust the regulator pressure according to instructions provided by the manufacturer.
7. Allow CO2 gas inside the keg for about 15 minutes before serving the first glass; this will ensure proper carbonation levels before enjoying the first pour!
8. Clean all parts thoroughly after each use to maintain hygienic conditions for future batches; follow manufacturer instructions for the cleaning process if necessary.
Step 1 – Gather Your Equipment
Before you can begin kegging your homebrew, you must gather all the necessary equipment.
This process includes a sanitizing solution, a CO2 tank, a high-pressure regulator, airline tubing, and pin lock kegs.
A 5-gallon Cornelius keg is typically used for home brewing since it allows for easy storage and transport of your beer.
Depending on your setup type, you may also need additional items, such as a tap, refrigerator, or freezer.
Step 2 – Clean Your Keg
Once you have gathered all the equipment for your kegging setup, it’s time to clean the keg. Start by running hot water through the keg until it is filled with hot water and then add 1 tablespoon of detergent per gallon of water used in the cleaning process. Allow the solution to sit in the keg for 15 minutes before draining out all the water and rinsing thoroughly with fresh hot water until no more detergent remains.
If possible, use a brush or other cleaning instrument inside the keg to ensure that any dirt or debris is removed from its surface before use. Once finished cleaning, allow the keg to dry before filling it with beer.
Step 3 – Fill The Keg With Beer & Carbonate It
Now that your keg is cleaned and dried, it’s time to fill it with beer!
Connect an airline tubing to an empty CO2 tank directly to one of the ball lock kegs fittings on top of the Cornelius Keg lid after transferring your beer into the sanitized Cornelius Kegs using a racking cane or siphon tube. (this is known as “pressurizing”).
Next, turn on your CO2 tank regulator (make sure not to open too quickly as this can cause foam) until pressure reaches 10 PSI (pounds per square inch).
Finally, let carbonation occur over 48 hours before opening up and tapping into your freshly brewed beer!
Conclusion
With basic knowledge about setting up a proper home brewing system and following these three simple steps, anyone can create delicious craft beers from their homes!
Kegging homebrewed beers offers convenience compared to bottling them, so if you are looking for an easier way to enjoy great-tasting craft beers, try out these tips today! Not only will you save time, but you will also get tastier results in less time than ever! Cheers!