


Brewing beer is a complex process that requires patience, knowledge, and skill. But the most important factor for achieving the perfect carbonation levels in your bottle-conditioned beer is knowing how and when to add priming sugars.
Priming sugar is what will trigger the secondary fermentation to carbonate your beer. Read on for tips on getting perfectly carbonated bottle-conditioned beer every time.
What is Bottle-Conditioning?
Bottle-conditioning is a method of beer carbonated in which brewers add a small amount of sugar to their beer before bottling.
This allows for a secondary fermentation process within the bottle so that natural carbon dioxide is created and released, thus resulting in carbonated beer. The method has been around since at least the 1800s and is still used by many brewers today because of its simplicity and affordability.
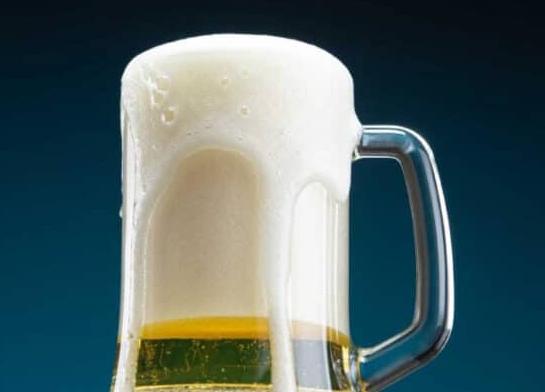
A Guide to Perfectly Carbonated Bottle-Conditioned Beer
Carbonation is an essential element of beer. It not only gives it the desired “fizz” but also helps enhance the beer’s aroma and flavor.
Bottle-conditioned beer is a popular way to carbonate your brew, as it doesn’t require additional equipment or extra steps during the brewing process.
When To Add Priming Sugar
The best time to add priming sugar is after fermentation has slowed down but before it has finished.
This means you should wait until you no longer see bubbles forming at the top of your fermenter and there is little or no activity in the airlock before adding priming sugar. If you add it too early, you risk over-carbonating your beer; if you add it too late, it will be under-carbonated.
The Amount Of Priming Sugar You Need
The amount of priming sugar needed depends on several factors, such as temperature, yeast type, and alcohol content of the beer itself.
Generally speaking, an average-strength ale needs about 3/4 cup (140 grams) of corn sugar per 5 gallons (19 liters) of wort.
Depending on their characteristics, lagers and higher gravity beers may require more or less priming sugar. It’s always better to use more than less because it’s easier to fix an over-carbonated beer than an under-carbonated one.
You can also buy a hydrometer to measure specific gravity, which will help determine how much priming sugar you need for your particular batch of beer.
Bottle Conditioning Tips
Once you’ve added the priming sugar, it’s time to bottle condition your beer – this involves transferring the fermented wort into bottles with a bottling wand and then capping each bottle with a sanitized cap or crown cap.
Make sure not to fill each bottle up, as they need “headspace” for carbonation reactions to occur once they are sealed shut again!
Then let them sit at room temperature out of direct sunlight until they reach their desired level of carbonation – this usually takes around two weeks but can vary depending on temperature and other factors, so make sure you have patience!
Once they are ready, store them cold – this will help slow down further fermentation reactions and keep your beers tasting fresher for more extended periods!
Tips For Achieving The Perfect Brew
1. Choose The Right Yeast – When choosing yeast for your bottle-conditioned beer, select one that produces low levels of esters (fruity aromas) so that it does not overpower your intended flavor profile.
Additionally, make sure that you use a yeast strain that has been designed explicitly for bottle conditioning so that you get optimal results from your fermentation process.
2. The Right Amount Of Sugar – Too much sugar can result in carbonation, while too little sugar can result in under-carbonation; therefore, it’s important to measure the exact amount of sugar you need for your specific recipe.
Typically, brewers suggest using around 4–5 ounces of priming sugar per 5 gallons of wort (unfermented beer).
3. Keep Temperature Consistent – Temperature plays an essential role in successful fermentation; if temperatures fluctuate or become too hot or cold, it could affect the quality and taste of your final product.
Therefore, it’s always best practice to keep temperatures consistent throughout the entire fermentation process so that all ingredients work together synergistically and create a perfectly balanced brew.
4. Store Bottles Upright – Make sure you always store bottles upright after filling them with priming solution and before capping them off with airtight lids; this will help ensure an even distribution of CO2 throughout each bottle and lead to better tasting results overall!
What Are The Ways To Carbonate Beer?
Carbonated drinks like a beer can be carbonated in two primary ways: naturally, through a process known as bottle conditioning, or artificially, through techniques such as force-carbonation or blast-carbonation.
Natural Carbonation
Bottle conditioning is the traditional and most common method of carbonation. It involves adding a small amount of priming sugar to the fermented beer before bottling it. This allows the yeast to consume the sugar, producing carbon dioxide and creating a natural level of CO2 in the beer.
Artificial Carbonation
Force carbonation and blast carbonation are two methods of artificially carbonating beer. In force-carbonation, carbon dioxide is pumped into the beer to achieve the desired level of carbonation.
While blast-carbonation involves rapidly injecting large amounts of CO2 gas into the beer.
Both these methods are faster and can offer more consistency than bottle conditioning, but they may not produce as natural or complex flavors as a naturally-carbonated beer.
Conclusion
Bottle-conditioning is an easy yet effective way to achieve perfectly carbonated homebrewed beer without investing in expensive equipment or complicated processes.
By adding a small amount of priming sugar before bottling your brew, you can create natural CO2 gas that will remain dissolved in your beverage until consumed—giving you delicious results every single time!
So if you’re looking for an affordable way to get great-tasting foam on top of your favorite brews, look no further than bottle-conditioning!
Whether you’re just starting with homebrewing or have been doing it for years, mastering perfect carbonation levels in your bottle-conditioned beers can be tricky, but with patience and practice comes success!
Related: How To Carbonate In Mini Kegs