


Homebrewers often need clarification when it comes to yeast washing and rinsing. Is there a difference between the two processes? How do you decide which is suitable for your next batch of beer?
Are you a homebrewer or craft beer maker who’s heard about yeast washing and rinsing but needs to figure out what the difference is?
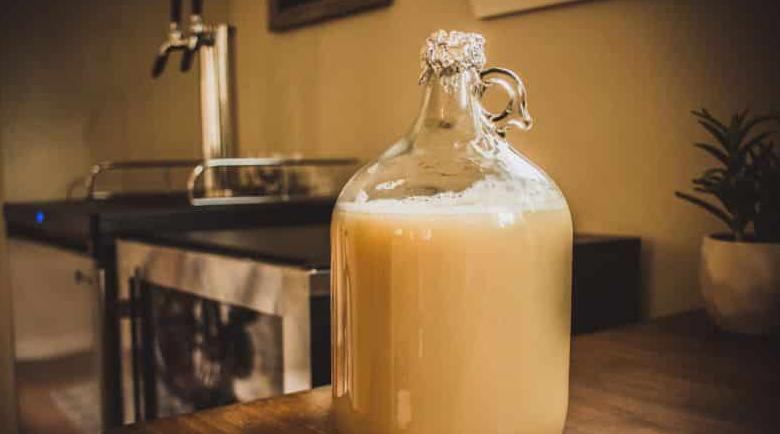
Yeast washing and yeast rinsing involve fermentation, using this conical fermentation tank in brewing beer.
Read on to learn how these two processes differ and how they can help you brew better-tasting beer!
What Is Yeast Washing
The yeast washing process involves transferring yeast from one fermenter to another, usually after the primary fermentation.
Yeast-washing beer helps remove any impurities left over from the brewing process, such as proteins, hop oils, and trub (unfermentable solids). It also helps reduce the amount of oxygen exposure your beer will get during the transfer, which will help preserve its flavor.
You’ll need a sanitized jar or container with an airtight lid to wash your yeast. If you collect your yeast in this container, you can store it in the fridge for up to four weeks.
The most important thing to remember about yeast washing is that it requires a bit of preparation beforehand.
Before transferring the used yeast from one vessel to another, it should be allowed to settle at the bottom of the original vessel for several hours or overnight.
Then, after carefully pouring off most of the liquid, please remove any remaining trub (sediment) as much as possible before transferring the slurry into its new container.
This will help ensure that any bacteria in the old trub don’t end up in your newly washed yeast slurry. The slurry will stratify into three layers:
- A liquid beer layer on top
- A dark layer of trub on the bottom
- A whitish layer of healthy yeast in the middle
Make a yeast starter with the washed yeast a day or two before you’re ready to brew.
Pour off most of the clear liquid above the yeast layer and give the jar a swirl to get the yeast cake in suspension. Add it to your starter wort with a few yeast nutrients.
Adding yeast washing to your skill set gives you the confidence to reuse yeast, helping you make the best possible beer, batch after batch.
Can You Dry Yeast?
Yes, dry yeast can be washed the same way as liquid yeast. It was once thought that dry yeast was sub-par compared to its liquid counterparts. But advancements in yeast technology have all but equaled the playing field. With the fantastic range of dry yeasts on the market today, feel free to wash and reuse yeast.
Benefits Of Yeast Washing
There are several benefits associated with yeast washing.
- For starters, it helps to reduce the cost of brewing since you don’t need to buy new yeast each time you want to brew a new batch.
- Additionally, it increases the health of your yeast because there are fewer impurities in the mixture and less chance for contamination from other sources, such as wild yeasts or bacteria.
- Finally, it allows you to reuse batches of beer faster since you don’t need to wait for more new yeast cultures before beginning another batch.
How To Yeast Wash
Yeast washing is fairly simple and generally only requires essential equipment such as glass or mason jars, sanitizing solution, water filters (optional), thermometers (optional), stirring sticks, and buckets.
The first step is to take your used beer off-flavors—such as acetaldehyde or diacetyl—from your finished beer since these compounds can build up over time if not appropriately removed during fermentation.
Once all off-flavors have been removed, add clean water into your fermenter and stir well until all traces of off-flavor are gone; strain out any large particles from the mixture and store them in glass jars or buckets with airtight lids until they can be used again.
What Is Yeast Rinsing?
Yeast rinsing is similar to washing in that it involves transferring yeast from one container to another.
So, think of rinsing the yeast as cleaning the yeast and washing the yeast as sanitizing the environment that the cells live. Both are entirely acceptable for repurposing the cells. It is simply up to you what you prefer to do.
The key difference is that when rinsing yeast, you don’t need to worry about removing impurities or reducing oxygen exposure—the emphasis here is solely on preserving as much of your yeast as possible for future batches.
To rinse your yeast, all you need to do is fill a sanitized jar or container with cold water and then add some sugar (about 3 tablespoons per gallon) before pouring it over your yeast cake; a better method of reusing yeast is called yeast rinsing.
From there, please give it a good stir and pour off any excess liquid before storing it in the fridge for up to four weeks.
Rinsing your yeast can help give future batches of beer a more consistent flavor profile because you know exactly how many viable yeast cells are being added each time.
Plus, since no oxygen is introduced into the liquid during this process, there won’t be any risk of oxidation spoiling our beer!
The process begins with collecting the yeast sediment from your last batch of beer and transferring it into a separate container filled with sanitized water.
The container should be airtight so that no oxygen can get in and contaminate the solution.
After the yeast cells settle at the bottom of the solution, let it sit for up to 24 hours.
Once the sediment has settled, carefully pour off most of the liquid on top without disturbing the sediment on the bottom—this is where all your viable yeast cells are located!
Finally, transfer this slurry (the mixture at the bottom) directly into your wort (unfermented beer). This will give you an instant starter culture that will quickly activate fermentation. And voila!
How To Rinse Your Yeast?
- Pour your harvested yeast from your fermenter into a sanitized container, such as a glass jar.
- Fill the container with cold water and add sugar (about 3 tablespoons per gallon). Stir the solution until all of the sugar is dissolved.
- Let the mixture sit for 24-48 hours so that all yeast cells settle at the bottom of the container.
- Carefully pour off most of the liquid on top without disturbing the sediment on the bottom – this is where all of your viable yeast cells are located.
- Transfer the slurry (the mixture at the bottom) directly into your wort (unfermented beer).
- Now you are ready to begin fermentation and enjoy your delicious, homebrewed beer!
Benefits Of Yeast Rinsing
The main benefit of using this method is that it allows brewers to reuse their yeasts instead of discarding them after each brew cycle.
- This helps save money and reduce waste since there’s no need to buy new packs of dry or liquid yeasts after every few batches.
- In addition, because only healthy strains are added to each successive batch, brewers are assured of consistently producing high-quality beers without having to worry about contamination or off-flavors that may result from pitching old, dead/dying/infected yeasts directly into freshly brewed beer.
- Finally, home or professional brewers can maintain consistency and predictability across multiple batches by reusing their yeasts instead of discarding them after each cycle since they know what strain they’re working with each time, so tasting will not be a surprise!
Conclusion
Yeast washing and rinsing can be beneficial tools for homebrewers looking to get the most out of their yeast while saving money in the long run.
With a bit of preparation and care, you can reuse your yeast multiple times with minimal effort.
Always use sanitized containers and equipment, and store your freshly washed or rinsed yeast in the fridge before using it again.
Have fun experimenting with different techniques and flavors to make your homebrew stand out!