


Upping Your Game
If you’ve been brewing with kit beers or extracts, or even all grain mashing using a Brew In A Bag system, you will soon be thinking about taking the step up to making your own all-grain brew house. While you can go for a large, multi-vessel brew house, a simple cooler can be transformed into a great insulated mash tun for infusion mashing.
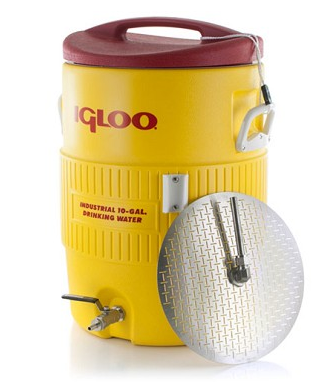
I’ve used the title of “Igloo Cooler Mash Tun” because the Igloo is a good, round cooler – perfect for our purposes.
How it Works
The Igloo Cooler Mash Tun in fact combines mash and lauter tuns, which means you will be both mashing your grain and lautering it in the same vessel. In simpler terms, this means you will be soaking your malted grain to convert and extract sugars, and you will also drain the liquid (wort) from the same vessel.
The malt and hot water (called hot liquor) will be inside your cooler, where the insulation keeps the temperature just right. The wort is then drained and the sparge begins (rinsing the malted grain with more hot liquor to get more of the sugars out).
 What You’ll Need
- Brew Kettle (big pot, slightly larger than your batch size)
- Igloo Cooler (any good brand is ok – preferably round)
- False Bottom (something that allows the liquid to drain from the bottom of the cooler but keeps grain out)
- Tap or Faucet (attached to the false bottom but extending outside the cooler)
- Wort Grant (something to hold your wort until your kettle is empty – a fermenter works well)

With the above equipment added to your standard brewing gear, you should have enough to build and run a highly efficient infusion mash.
You can get plans on how to build one via John Palmer’s How To Brew, as well as numerous resources online, but it’s much easier to buy one ready-made. . Whether you build one yourself or buy one ready-made, you can expect to pay between USD $100 and $200 (or $300 – $500 if you buy all your starting gear at the same time).
The Process
Before you start, place your mash tun on a bench or raised platform, such as a chair – but be sure the platform can support the weight of your cooler full of grain and water!
Adventures in Homebrewing have a great how-to-video, although it’s all in US Imperial measurements.
Heat The System
Using your brew kettle, heat water (now called hot liquor) to your strike temperature. Your strike temperature will be higher than your first infusion temperature to allow for the ambient temperature of the grain.
Before you begin mashing, pour some hot liquor down the insides of the mash tun to raise the temperature in anticipation of your first infusion. You can then drain the water and begin the process.
Dough In / Mash In
Doughing in, also called mashing in, is the process of mixing hot liquor and cracked malt together. You want to add bit by bit: a little hot liquor, a little malt, stirring thoroughly, until you have all your malt in the mash tun and around 2.5 liters of water to every kilo of malt (that’s around 1.3 quarts to 1.1 pound).
Now check your temperature – you should be at your first infusion. If the temperature is off, adjust it by stirring in hot or cold liquor until it is correct.
Mashing
Like most home brew systems, the Igloo Cooler Mash Tun is best suited infusion mashing, where the malt is infused into the liquor and temperature is raised for each step by adding hot liquor. You can also use a decoction mash on this system, but it’s an advanced brewing technique and you might want to start on the easy stuff first.
Your recipe will call for different steps, which is simply a different temperature for a certain period of time. To raise the mash to the next step, stir in hot liquor until you hit the right temperature.
The use of good brewing calculators will really help in knowing how much boiling water you will need to raise the mash!
Lautering
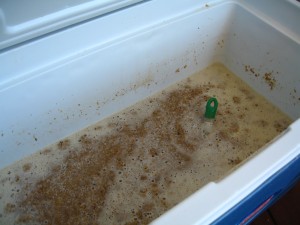
Lautering is the process of draining the wort. You can achieve a much better clarity with this mash tun than with the BIAB system, and here’s how.
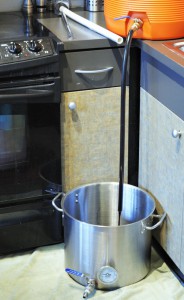
First, you will want to recirculate the wort. Drain the wort (slowly) from your mash tun into your grant – a fermenter makes an ideal grant. Next, place a plastic plate or something similar on the grains remaining in your mash tun (now called the grain bed).
You will now add the wort slowly back to the mash tun, pouring the liquid onto the plastic plate so as not to disturb the grain bed. Refill until you have about two inches of wort above the grain bed. Now, using a small saucepan, drain wort into the grant at the same time as refilling the mash tun from the grant – a recirculation process! Repeat this process until no more bits of grain come out with the wort.
Once the wort is flowing clear, you will start the sparge. Sparging is an old Scottish word, meaning “to rinse”. Begin by adding hot liquor to the mash tun as the mash tun drains into the grant. Remember to keep it two inches above the grain bed.
Once you have collected slightly more than your final target volume, you can start the boil!
Review
The Igloo Cooler Mash Tun is much easier, more efficient, and yields better results than the BIAB system. It is also somewhat more versatile, although not as much as a custom-built brew house. I used a cooler mash tun very happily for several years and only ceased because I moved overseas.
The only reason you would ever want to upgrade is for greater volume or to automate some of the process – the Igloo Cooler Mash Tun is pretty manual, but can be incorporated into bigger brew house plans quite easily.
Where To Get One
- Build one yourself
- In the USA, Adventures in Homebrewing have some pre-made, with high quality false-bottoms
- In Australia, the UK or Canada
 Cheers!
If you would like to know more, or you have something to share, please leave a comment!
Related: Home Made Vs. All-In-One Brewing Systems, Common Mistakes When Keeping Beer Cold and 7 Easy Ways To Add Personalization To Your Beer Koozies
I love home brew beer myself but I haven’t advanced to this level. I use the brew cans personally and they are pretty good. At least for me anyway.
When I decide to upgrade my brewing and take it to the next level I’ll definitely be looking at buying one of these things. I like how you have made it easy to see the pros and cons, this makes it easy for me. Thanks for sharing
Hi Tim, thanks for commenting.
While you are still brewing from cans, please check out my other post here: https://winningbeers.com/how-to-improve-kit-beer
Happy brewing!
Hi
Great post.
I am very tempted to give it a go, but I never knew there so much of a process! I remember my Dad used to homebrew beer in the garage and I don’t remember any of this! Possibly why it tasted like socks? lol
I love beer. I Have bookmarked your site and will be taking your advice on how to get started.
Would you recommend leaping in wholehog or start easy and go with readypacks/tins?
Hi JB,
I recommend starting with ready packs just for the first one or two batches, so you can see if you really do enjoy brewing before you spend too much on any further system.
If you do like making beer after your first one or two batches, then by all means go whole hog! The initial equipment will all be a part of your all-grain system anyway.
Cheers!